VR Projects
VR Projects In Unreal
The Unreal Engine was developed by Epic Games and acts in a similar fashion to Unity, but relies more on a visual scripting language called Blueprints. Instead of using C# scripts found in Unity, Unreal uses its node based blueprint visual scripting system to create interactions. It is also important to note that the blueprint coding system in Unreal is based off of a C++ scripting language. This is important in case you decide to use custom scripts that are not available in the existing Unreal packages.
The main advantage of using Unreal to Unity is the visual quality of the rendering engine. Unreal and Unity have very different rendering engines for their 3D environments, which is especially notable with lighting. In almost all cases, Unreal tends to look better in terms of visual aesthetics compared to what you would see in Unity.
Resources:
Unreal VR Development Tutorial
Immersion Studio Unreal VR Temple Project
Working With The Unreal VR Template Project
The Unreal VR template project can be downloaded from the resources link, and contains everything you need to create a VR experience for either a VR headset or for the Immersion Studio. More specifically it contains 3D royalty free assets, an interactable 3D environment, and the plugins required for SteamVR interactions and for the Immersion Studio. You can use the resources provided in the project folder as you wish, and add your own assets to the template project. It should be noted that if a VR project was created in Unreal using the Open XR plugin or Oculus plugins, these will need to be disabled in order to use the VR controllers that are compatible for the Immersion Studio.
VR Navigation & Interactions
Similar to the navigation in Unity, locomotion will be handled through teleportation instead of omnidirectional arrow key movement. The teleportation works exactly the same way as it does in Unreal to how it works in Unity, with only slight visual differences. However, there are different ways of setting up the navigation in Unreal as opposed to Unity, which we will go into. The steps below will allow navigation and interaction with your own Unreal project by focusing on two main components that can be applied to your 3D objects.
If you are starting with your own Unreal project, you will need to follow the steps below to allow VR navigation. Please note that the VR controllers will not work if the proper plugin is not enabled. The Immersion Studio always uses SteamVR for VR interaction, so this plugin must always be enabled, with every other XR plugin (such as Open XR) be disabled.
VR Navigation
- In your open Unreal project, make sure the “Place Actors” panel is open by enabling in the Window tab at the top of the editor
- Once your place actors panel is open, find the “Nav Mesh Bounds Volume” using the search bar
- Drag the Nav Mesh Bounds Volume into your open map. You will notice the object appears as a box outline. Anything within this box will be enabled for navigation.
- After the component has been added to your map, you can enlarge and move the Nav Mesh Bounds Volume to fit the size of your 3D environment.
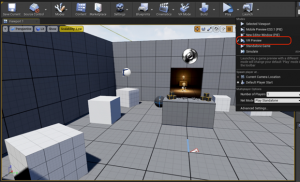
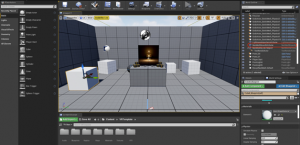
- Your map should be enabled for VR controllers navigation, which can be tested by using the VR Preview play button at the top of the editor. If done correctly your map will look similar to the image below, and have the NavMeshBoundsVolume component in the World Outliner panel on the right side.
VR Grab Interaction
1. In the Place Actors panel, click and drag in an empty actor into your map
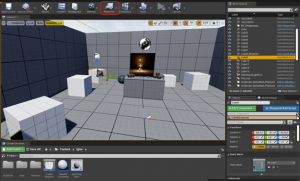
2. With the empty actor selected, click on the blueprints button at the top as seen in the image below
3. Click “Convert Selection To Blueprint Class”
4. In the popup window, search for the “Grabbable_SmallCube” and click select
5. Next, navigate to the Details panel and change your static mesh and your material to the new object you would like to be interactable.
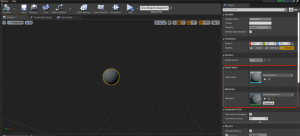 6. Click the compile button at the top of the window as seen in the image below
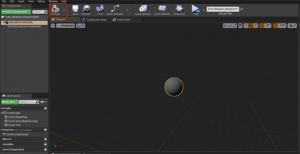 7. Your object should now be grabbable. You can test this by clicking VR Preview in the drop down of the play button see in the image below