Intro to Alternate Workflows
Revit and Unreal Engine 5:
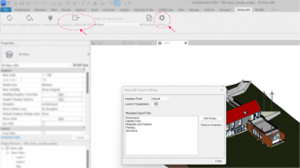
- To download the Datasmith plugins for various CAD software, such as Revit, 3Ds Max, Rhino, and SketchUp, follow the link provided and click on the “GET THE PLUGINS” button. Then, download the Autodesk Revit Exporter and install the file.
2. Open your Revit file. You will see a new tab called Datasmith in your top panel. From settings, you can change the Level of Tesselation and Insertion point. You can bring your file into Unreal using two methods: exporting your project as a Datasmith file or using the real-time connection. If you’re done editing your file, export it as a Datasmith file. However, if you’re still updating it, use the real-time connection instead.
OPTION A: EXPORTING AS A DATASMITH FILE
- To export your file, click on the “Export to Datasmith File” button, create a new folder for your exported file, open it, and save your export in that folder. Wait for the exporting process to finish.
IMPORTANT: purge your file before exporting and delete anything that you can add in Unreal later, such as the plants or furniture objects with low quality.
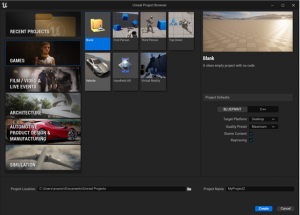
- Go to Epic Game Launcher and launch a blank Unreal Engine 5 project. To do this, select “Game Mode”, and then “Blank”. Alternatively, you open a Virtual Reality scene, which already has blueprints for many interactions in the starter content. Select blueprint, and click create.
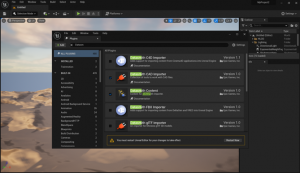
- For Unreal to read the Datasmith file, activate the plugin within Unreal. To do so, go to “Edit” from the top menu and select “Plugins”. In the search bar, search for “Datasmith”. A list of relevant Datasmith plugins will appear. Select the “Datasmith CAD Exporter” checkbox and click the “Restart Now” button.
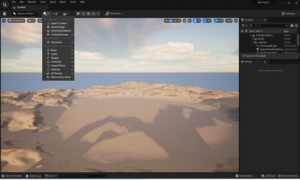
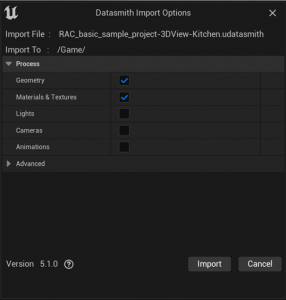
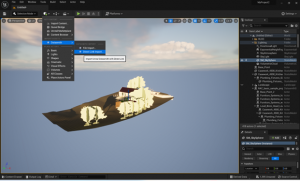
- Once Unreal has restarted and reopened, click on the “Add” button from the top dropdown menu and select Datasmith. From here, you can choose the “File Import” option. Then, locate the folder you created before and open the exported Datasmith file. Choose the “Content” folder as the location for the import and in the next window, deselect “Lights”, “Camera”, and “Animation”, then click on “Import.”
OPTION B: USING REALTIME CONNECTION
- To use the realtime connection instead of importing files, you can use Directlink Import in Unreal. To generate the link, first select the connection button in Revit. Then select the “Direct Link Import…” from the dropdown menu to import your project.
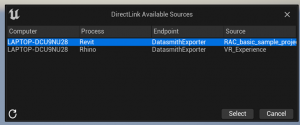
- If you have different projects open in both Rhino and Revit or different Revit files, you may see different available sources in the opening import pop-up window. Make sure to select the correct source to import the correct file into Unreal.
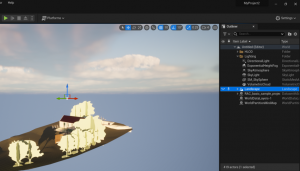
9. In the blank Unreal project, there is already a landscape layer. To clean and organize your scene, you can hide or delete the layer from the right window.

