Main Body
5 Anatomical Locations
You need to be familiar with anatomical locations when performing a physical assessment for two reasons:
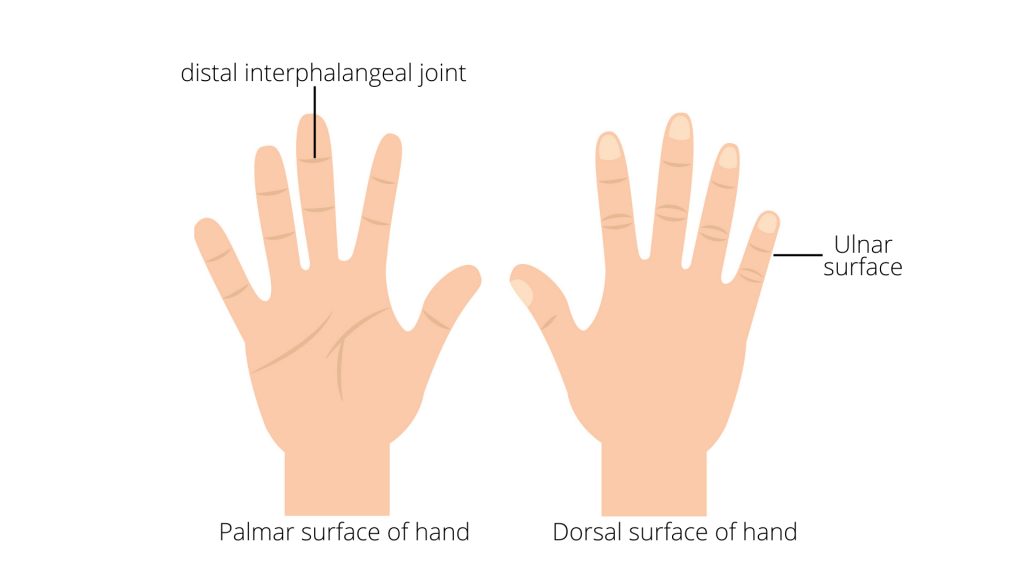
- First, you need to use parts of your own hands to do particular assessments. Figure 1.4 illustrates the parts of your hands that are commonly used to perform a physical assessment, including the dorsal and palmar aspect of the hands, fingertips, the ulnar surface, and the distal interphalangeal joints.
- Second, you need to be able to accurately note the anatomical locations when communicating and documenting normal and abnormal findings. For example, it is too vague for a nurse to say that a client is having pain in their left arm. A more specific and accurate statement is the client is having pain on the anterior side of their left arm, two inches superior to the wrist. Therefore, it is important that you have access to a ruler or measuring tape so that you can accurately identify the location of any variations. For example, you may note swelling 2.5 cm distal to the right medial malleolus. This most accurately describes the location and allows you to measure any changes over time.

Figure 1.4: Hands
Let’s examine how to identify these anatomical locations.
You need to understand what the anatomical position is so that you can note findings based on this position. See Figure 1.5 and Figure 1.6 for an overview of the anterior and posterior view of the anatomical position with the client standing upright, facing forward, arms positioned at the side with palms of hands facing forward, and feet slightly apart and facing forward.

Figure 1.5: Anterior view of anatomical position

Figure 1.6: Posterior view of anatomical position
Specific anatomical reference points will help you identify and note locations. Avoid using vague terminology that can be misinterpreted, such as “beneath,” “inside,” “beside,” “above,” or “below.” Instead, use anatomical reference points such as proximal or distal, inferior or superior, medial or lateral, and superficial or deep.
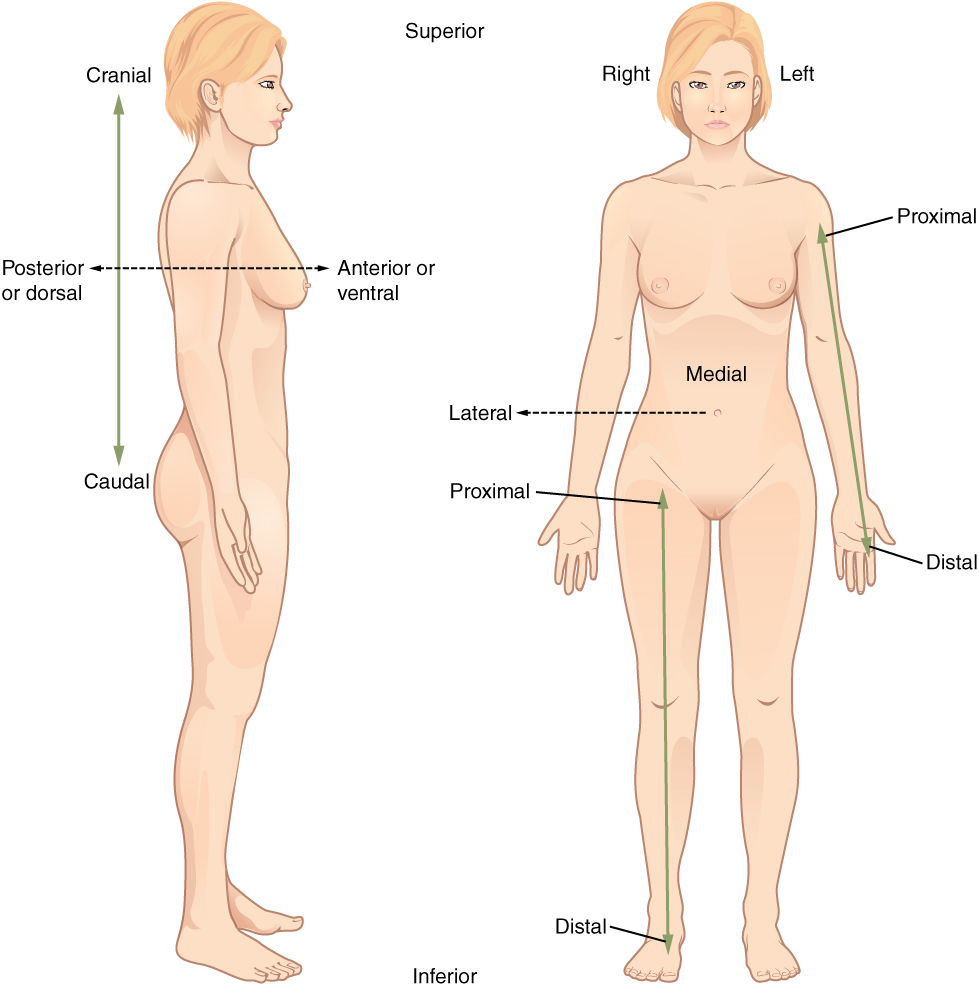
See Figure 1.7 for an overview of anatomical reference points and the descriptions here:
- Anterior – the front side or further to the front (also sometimes referred to as ventral)
- Posterior refers to the back side or further to the back (also sometimes referred to dorsal).
- Medial – the midline of the body (e.g., a longitudinal line that runs down the centre of the body dividing it into the right and left side of the body) whereas lateral refers to moving further away from this line.
- Proximal – nearest the trunk or centre of the body whereas distal refers to further away from the trunk of the body. These terms are typically used when referring to a point on the limbs (e.g., the arm or the leg).
- Inferior – something below an anatomical location or near to the feet whereas superior refers to something above an anatomical location or near to the head.
- Superficial – something close to the surface of the body whereas deep refers to something further away from the surface of the body.

Figure 1.7: Anatomical reference points, from Betts, et al., 2013. Licensed under CC BY 4.0.
Each body system has specific anatomical reference points, which are explained in more detail in other resources related to each body system. And last, you will need to position the client in several different positions when performing a physical assessment including sitting upright on the edge of the bed, supine, lateral, high-fowlers, and semi-fowlers.

