
Main Body
Tutorial 4 • Seeing is Believing: Creating Natural Compositions
Overview
A composite is when multiple images are brought together to make it seem like they are all part of the same image. This is to create the illusion that all of the separate image elements are part of the same scene. Sometimes photos are taken at different times or used with different cameras and Photoshop must be used to make the composite more natural-looking. This tutorial will look at different tips and techniques to make your composite appear more natural.
Objectives
- To understand how to analyze and determine which images are right for the same composite
- To understand perspective as it relates to making your composite natural
- To use layer masks to make images more natural
- To better customize how auto-colour correction is used
- To match brightness, colour and contrast from one image to another using adjustment layers
- To use advanced methods of Curves
When selecting images for your composite, think about the lighting in these images and consider the following:
- What direction are the main light sources coming from in both images?
- Make sure they are matching or can be matched
- If the light source is coming from the opposite direction, flip the image
- How harsh is the light and what effect does it have on the shadows?
- Is the light harsh and creating harsh shadows? (E.g. shadows created on a sunny day.)
- Is the light not as harsh and the shadows are softer? (E.g. shadows created on a cloudy day.)
- What is the influence of the surrounding environment on the subject?
- Are there reflections of light or colour on the subject?
The more similar the direction of light, the more natural your composition will be.
The more different the light sources are, the more editing will be required to make the composition look natural. Consider this when choosing images for your composition.
Quick Compositing
In this tutorial, we will be masking out a croissant from an image and compositing it with another image of breakfast to make it appear natural:
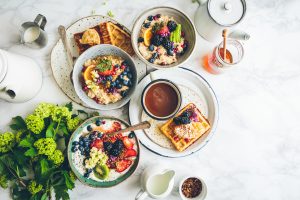
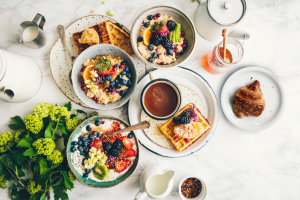
Photo by Brooke Lark on Unsplash [New Window]
Photo by João Marcelo Martins on Unsplash [New Window]
- Open the tutorial file named GCM738_Tutorial_04_Breakfast.psd. Save it as GCM738_Tutorial_04_Breakfast_YourIntitials_v1.psd.
- Double click on the Background Layer and rename it to Original Image.
- Take a look at the shadows and the direction of the shadows in this photograph.
- Notice the soft shadows that are being created by the plates.
Positioning the Croissant
- Place Croissant.jpg into the file you just opened.
- Rename the layer as Croissant.
- Change the Opacity of the layer to about 40%.
- Click on the Croissant Layer, go to Edit → Transform → Rotate. In the Options Bar, change the angle to about 75 degrees to match the shadows of the plates of the other places. We want the shadow inside of the plate to be on the right to match the other plates.
- Select the Move Tool, reposition and resize the layer so that the plate with the croissant fits the composition. Somewhere next to the plate in the centre and below the honey will work. Do not worry about the other elements around the croissant as they will be masked out.
- Click on the Checkmark in the Options Bar and change the Opacity of the Layer back to 100%.
Masking out the selection
- Using the Curvature Pen Tool, click on the rim of the plate and then click on another part of the rim. Then click on the middle of the line created by the Pen Tool and drag upwards to make a curve.
- In the Paths Panel, click on the work path and then click on the Dotted Line Circle at the bottom to Convert Path to Selection.
- Go to Layer > Layer Mask > Reveal Selection
- Click on the mask and in the properties panel, click on Select and Mask… in the Options Bar.
- Under Global Refinements in the Properties Panel, adjust Smooth to 70 (*Note, these numbers can change depending on how well you created your selection with the curvature pen tool. Play around with these numbers slightly to achieve a nice clean mask).
- Adjust Feather to 1px
- Adjust Contrast to 20%
- Adjust Shift Edge to -30%.
- Press OK
- With your selection made, create a Layer Mask to reveal the selection.
Match the Brightness and Contrast
- Create a New Adjustment Layer and Select Black and White. This allows you to strictly look at the lightness and darkness in the image.
- Create a New Adjustment Layer and select Levels above the Croissant layer and ensure that it is a Clipping Mask to the Croissant Layer.
- Rename this layer to Brightness
- Notice how the plate is fairly gray. Select the White slider on the right hand slide under the Graph and slide it to a value 240.
- Delete the Black & White layer.
Match the Colour
- Create a New Adjustment Layer and select Solid Color… and choose a bright orange colour. Any kind of orange will work.
- Change the Blend mode of the new adjustment layer to Saturation. This layer will help us to colour match the images.
- Create a New Adjustment Layer and select Colour Balance above the Croissant layer and ensure that it is a Clipping Mask to the Croissant Layer.
- Add more Red into the image and change the slide to +4.
- Add more Green into the image and change the slider to +1.
- Add more Yellow into the image and change the slider to -4.
- Delete the Orange layer.
The goal here is to match the colours of the plates in the croissant to the breakfast image.
Create a Subtle Shadow
- Create a new blank layer under the Croissant layer and above the Original Image.
- Using the Eyedropper tool, select the colour of the darkest shadow from the original image. Notice that not all shadows are black. Some have a colour tint depending on the image. This is why we use the eyedropper tool.
- Select the Brush Tool, ensuring you have a soft round brush selected, change the brush size to 250 px and the Opacity to 16%.
- Take your time and paint in the shadows where they would be. Use the other plates in the original image for reference.
- You can hold down the ~ key to erase away some of the shadows if you need to.
Use a Colour LUT (Lookup Table) to tie it all together
- Create a New Adjustment Layer and select Colour Lookup. Ensure that it is at the top of your layers.
- From the dropdown menu where it says Load 3D LUT…, select a LUT that you feel works for your image. These work like filters. If you feel the filter is too strong, feel free to adjust the Opacity of the layer.
- Save your file.
Video created by Afrah Usman.
Compositing with a Person
The previous tutorial was a quick way to colour match objects that you choose to bring into your composition. This tutorial will now be a bit more complex but will help to make your compositions with humans more natural, especially if they are the main subject.
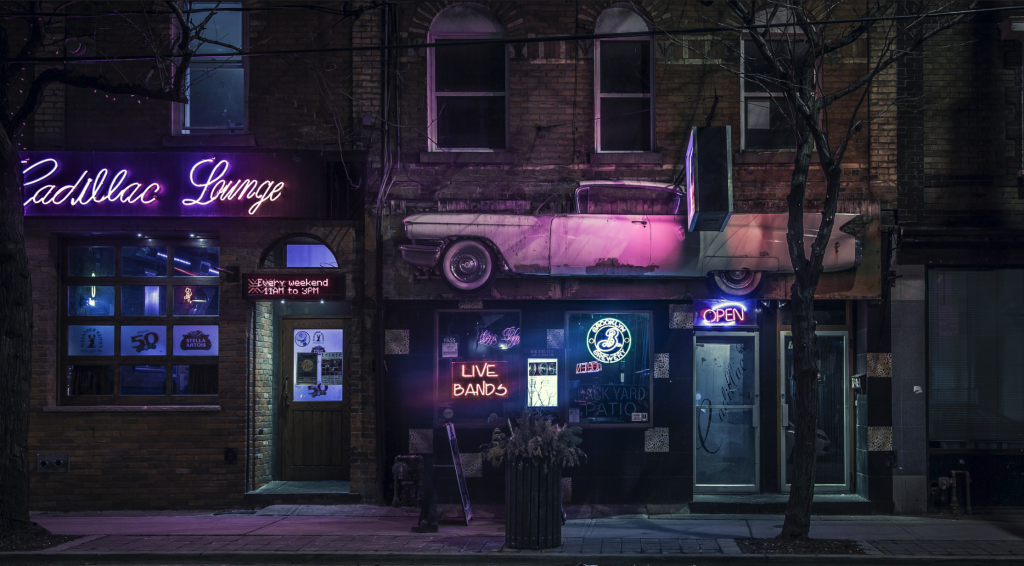
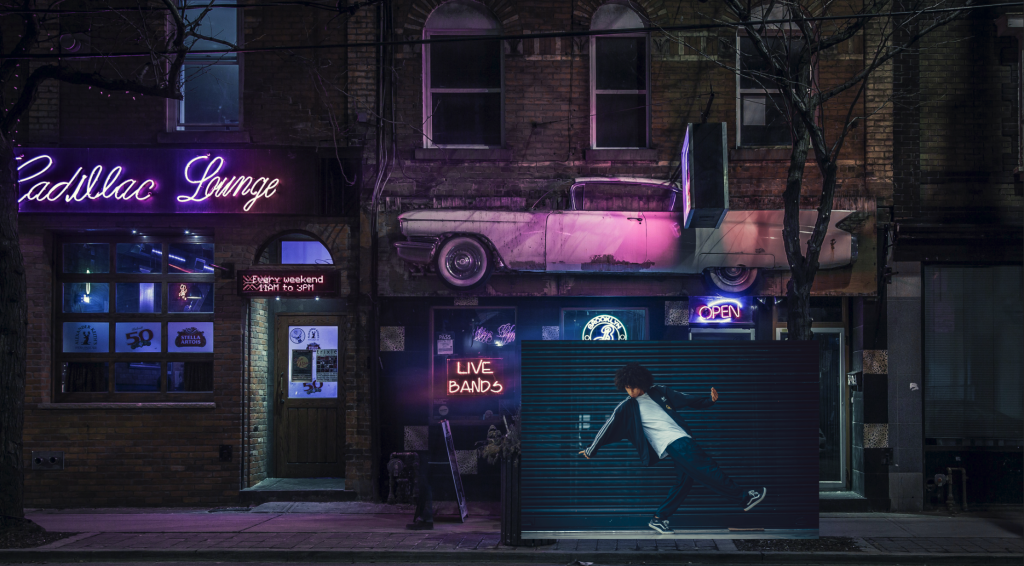
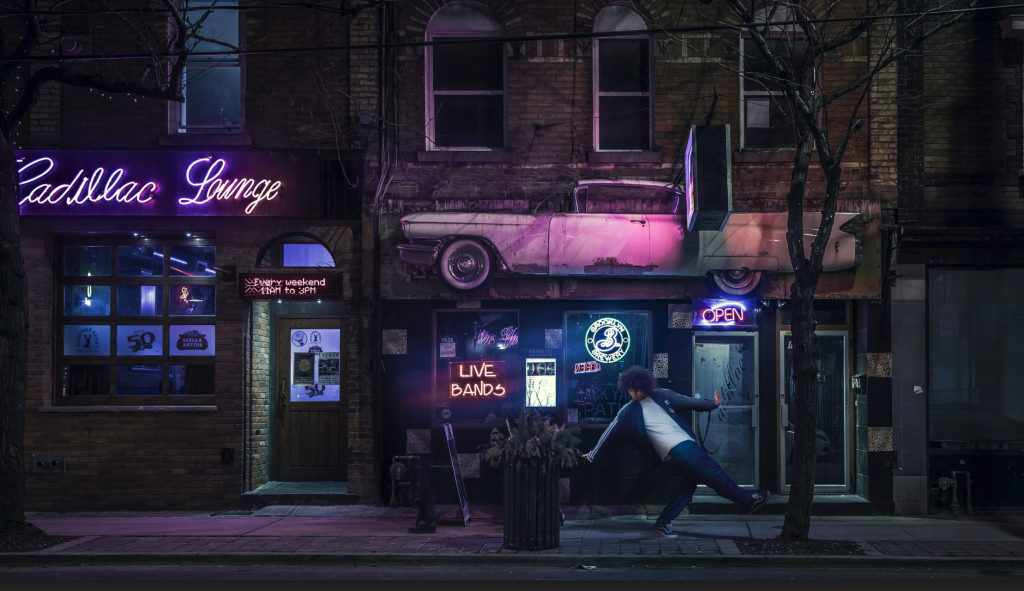
Photo by Matthew Henry on Unsplash [New Window]
Photo by Breakreate on Unsplash [New Window]
- Open the tutorial file named GCM738_Tutorial_04_Nightscene.psd. Save it as GCM738_Tutorial_04_Breakfast_YourIntitials_v1.psd.
- Double click on the Background Layer and rename it to Original Image.
- Notice where the lights are coming from in this scene. Notice the colours they cast. Notice where the shadows fall.
Masking your subject
- Place the Breakdancer.jpg file into the file you just opened.
- Change the Opacity of the layer to about 40%. Resize to about 55% and position the dancer between the planter and the tree. Change the Opacity to back 100% once you are satisfied with the positioning and click on the checkmark in the Options Bar.
- From the Menu Bar, choose Select → Subject.
- In the Options Bar, click on the Select and Mask… button.
- Using the Refine Edge Tool or the Brush Tool with a soft brush to refine some of the ragged edges. Press OK.
- From the Menu Bar, choose Layer → Layer Mask → Reveal Selection.
- You can then turn off the background layer and refine the mask with a smaller, black, hard brush if you wish.
Adjusting Brightness and Contrast Using Levels
- Create a New Adjustment Layer and select Black and White. This allows you to strictly look at the lightness and darkness in the image.
- With the Breakdancer layer selected, create a New Adjustment Layer and select Levels. Make this a Clipping Mask for the Breakdancer layer and rename this to Brightness and Contrast.
- In the Properties Panel, slide the white stop to about 225 to adjust the highlights and make them slightly brighter.
- Slide the Black stop to about 25 to make the shadows slightly darker.
- Slide the Grey stop to about 1.2 to make the midtones slightly lighter.
- Ensure the Blend Mode of this layer is set to Luminosity. Although the change is very subtle, this ensures that the changes only affect the lightness and darkness of the image rather than the colours of the image.
- Delete the Black & White adjustment layer.
Matching Colours
- Create a New Adjustment Layer and select Curves. Make this a Clipping Mask for the Breakdancer layer and rename this to Colour Matching.
- Ensure that the adjustment layer thumbnail is selected and not the adjustment layer mask. In the Properties Panel, hold down option (Mac) or alt (PC) and click on Auto.
- In the Pop-up dialogue box, select Find Dark & Light Colors.
- Under Target Colors & Clipping, double click on the colour box next to the shadows. Click on the darkest area of the background image closer to the bottom of the stores. Notice that the shadows in this area are closer to blue. Once you have selected the shadow, click OK.
- Do the same for the highlights but select the lightest part of the image like brighter parts of the “OPEN” neon sign. Remember to not choose an area that is 100% white. You’re looking to get the colour of the cast in the highlights.
- A popup will ask if you want to save the new target colours as defaults. Select No.
Adding Highlights and Shadows to the Image
- Consider where the highlights and shadows fall on your subject. Think about where the light source is and where it is coming from.
- Create a new blank layer and create a clipping mask to the Breakdancer. Change the blend mode to Multiply. Rename it Shadows.
- Using the Brush tool, ensure you have a soft round brush selected, change the size to 60 and the Opacity to 30%.
- Hold down option or alt to use the eyedropper to select a colour from the shadows.
- Lightly paint under the arm, torso and legs of the subject – anywhere the natural shadows would fall based on the lightsource.
- Create a new layer and clip it to the Breakdancer. Change the blend mode to Linear Dodge (Add). Rename it Highlights.
- Using the Brush tool, ensure you have a soft round brush selected, change the size to 60 and the Opacity to 15%.
- Hold down option or alt to use the eyedropper to select a colour from the highlights.
- Lightly paint the top of the head, arm, torso and legs of the subject – anywhere natural highlights would fall based on the light sources.
Create a Shadow of the Subject
- Create a new blank layer and name it Subject Shadow. Place it under the Breakdancer.
- With this new Subject Shadow layer selected, press Command or Ctrl and click on the Layer Mask of the breakdancer to create a selection.
- Turn off the Breakdancer layer for now.
- Select Edit → Fill and choose Color. You can now select a colour from one of the shadows.
- Cmd/Ctrl + D to deselect the image.
- Select the Move Tool, hold shift and resize the vertical proportions of the shadow so that it is “squished” and would appear as a shadow would. Click on the checkmark in the Options Bar.
- Select the layer, go to Filter → Blur → Gaussian Blur. Change the radius to 7px.
- Change the blend mode of this layer to Multiply and reduce the Opacity to about 60%.
- Turn the Breakdancer layer back on.
Tie it all together with a Colour LUT
A colour LUT (Lookup Table) is a method of colour grading your photos so that they have a distinct professional look. This is similar to using filters.
- Create a New Adjustment Layer and Select Colour Lookup. Ensure this is not a clipping mask and that it is at the top of all of your layers.
- Under 3DLUT File, you can load any filter that you think is applicable for the image. For this tutorial, we will use Fuji ETERNA 250D Fuji 3510 (by Adobe).cube.
- If you feel that the colour LUT is too harsh, you can adjust the Opacity to your liking.
- Save your file.
Video created by Afrah Usman.