
Main Body
Tutorial 8 • Animation Methods
Animation generally refers to movement of vector graphics. Objects that move have a great deal of impact and educational value, and vector graphics have small file sizes. User interaction and control can make animations that much more engaging.
Four ways to add animations to web pages (and ePub eBooks) include (1) CSS, (2) CSS with JavaScript, (3) jQuery, and (4) an animation program.
Animation with CSS
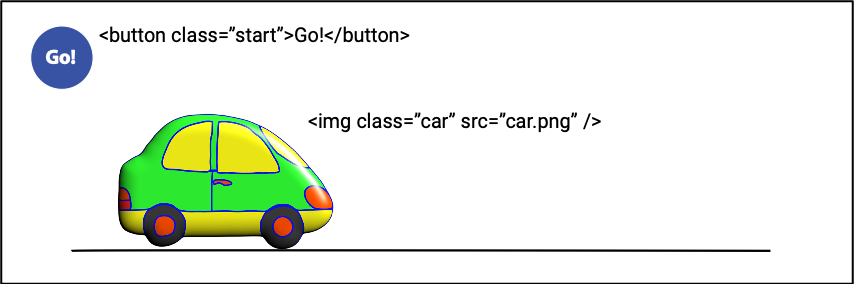
The CSS @keyframes rule and animation-name style enable you to animate objects in web pages, however there is minimal user control. If you want to have a button start the animation (as in the example above) or otherwise have user control, you would have to use JavaScript to connect the button with the object. For CSS animation the object must have position: relative; or position: absolute;, then you can control the left and top coordinates, along with other styles like size (width, height), color, and opacity.
The @keyframes rule specifies major change points as “from” and “to” or as percentage points from 0% to 100%, accompanied by the styles applicable to each point.
.car {

animation-name: letsgo;

animation-duration: 3s;

animation-fill-mode: forwards;

animation-iteration-count: 1;

position: absolute;

} @keyframes letsgo {

0% {left: 100px;}

100% {left: 700px;}

}
Animation with JavaScript
In the example above, a “Go!” button can be added and used to start the animation using JavaScript.
- For the car, set “animation-play-state: paused;”
- Write a JavaScript function to select the ID, “car,” and set the animation-play-state to “running” (see below).
- Add the function to the button: <button onClick=”animateCar()”>Go!</button>
<script>


function animateCar {document.getElementById("car").style.animationPlayState="running");

</script>
Animation with jQuery
User interaction can also be implemented with jQuery, an opensource library of JavaScript functions that was started by a group of MIT computer scientists. To use jQuery you have to either download and import the jQuery library (jquery-3.3.1.min.js) and the jQuery user interface (UI, jquery-ui.js), or connect to both from Google’s GoogleAPIs hosted site. jQuery uses the ID assigned to the button and the object to link the two.
$(function() {

$('start').click(function() {

 $('car').animate({left: '+=1200px'}, 1000);

});

});
In this example, we are animating the left coordinate of the “car” class by adding 1200px to the current value, which moves it off the screen, and doing the animation in 1000 microsec., or 1 sec. The animation is triggered when the user clicks the button, class ‘start.’
Animation with Tumult Hype
Tumult Hype (www.tumult.com/hype) is a vector-graphic animation program for MacOS similar to Adobe’s Flash and Animate. Hype has an easy-to-use interface and simple procedure for placing an animation into a web page or iBook. The publisher offers a fully functional demo for 15 days.

| Components in Tumult Hype | |
|---|---|
| Component | Function |
| 1 stage | document or pasteboard for the animation |
| 2 layers and properties | each object goes on a separate layer and is affected by CSS properties in the list |
| 3 timeline with playhead | controls timing of the animation |
| 4 keyframes | main points of change in the animation |
| 5 tweens | transitions between keyframes |
New Document
- Make a new document in Hype. Set the stage size to the width and height of the background image (864324px).
- Drag-and-drop the background image onto the stage.
- Drag-and-drop the car image onto the “road,” size appropriately, and place at the left edge of the scene.
- With the Elements, draw a rectangle with coloured circles that will be made into buttons.
Animation
- The animation sequence in Hype is: timeline > keyframe > position. To animate the car, first select it. Put the Play Head at 00:00.00 sec. and place a Keyframe for the Origin (Left) Property at that point.
- Move the timeline to 2 sec. (or the length of time you want the car to take to get off the screen) and place another Keyframe > Origin (Left) at that time.
- Move the car to the right, off the stage.
- Play the animation in Hype to see how it works.
Buttons
- To give users control over the animation, select the green circle that you drew. In the Actions Inspector at right (hand symbol), click on On Mouse Up (Touch End) > Action > Continue Timeline.
- To keep the animation from starting by itself, bring the Play Head to the 00:00.00 position. Set Timeline Actions > Action > Pause Timeline.
- To test your animation, click the Preview button, which will open it in the browser of your choice. Check that the button works and that the animation plays as expected.
Additional Steps
- To make the car turn around at the end of the animation, add a Keyframe for Rotation Angle (Y) and set to 180°.
- Add another Timeline Action > Pause Keyframe to make the animation stop before the car turns around.
- Add more seconds to the timeline to make the car drive back to the starting point and turn around again.
- Program a second button to bring the car back.
Export Animation
A Hype animation can be placed into into a web page by copying the indicated <div> tag and accompanying resources folder.
The animation can be placed into an Apple iBook by exporting to Apple Widget (.wdgt) format. Just drag-and-drop the .wdgt file into iBooks Author.
The animation can be placed into a fixed-layout ePub by exporting as Animated GIF, however this format offers no user control.