
Main Body
Tutorial 9 • Video
Videos add an element of interactivity to web sites, whether to show how something works, what it looks like, how it behaves, or how it feels to be there. Videos are sequences of bitmapped images, usually 24 to 30 per second, and therefore. The higher the resolution, the larger the file. Therefore it’s important to consider how much resolution is required, based on whether the video is intended to inform, persuade, or entertain.
iMovie
- Start iMovie. Note the three buttons at top left: Import, Create, Share.
- Import the MP4 video of the i1 iSis scanning spectrophotometer.
- Create (“+” symbol) a new movie called “i1 iSis.”
- In the Clips window, Select All and move the iSis clip to the stage.

Detach Audio
- Detach the audio from the video (right-click > Detach Audio or Modify > Detach Audio).
- Select the audio track and delete.
Add Time Lapse Effect
- Locate the frames and place markers (Mark > Add Marker) where the iSis starts and finishes reading the chart.
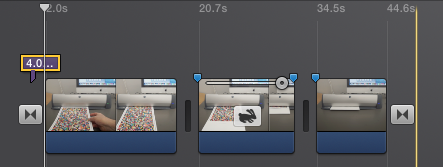
- Place the play head at each marker and split the clip (Modify > Split Clip).
- Select the clip and adjust the speed (turtle icon) to Custom > 2000% to speed up the movie 20 times.
Add Fade-In and Fade-Out
- From the lower left corner of the screen, select Content Library > Transitions.
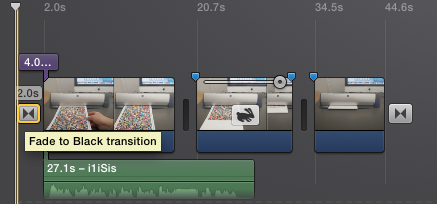
- Add a “Fade to Black” transition at the beginning and end of the movie.
Add Titles
- From the Content Library select Titles.
- Choose a title format and drag-and-drop the title onto the top of the movie. Add title text.
- Note that the title can start with or after the Fade-to-Black (fade from black) effect.
iMovie with 3 clips, 2-sec. fade-in from black, 4-sec. title, and 1-sec. fade-out to black
Write a Script
- Using the supplied template, write a script for a narrative about the i1 iSis, what it does, and how it works.
- Using a 3-column layout, write the scene in the left column, narrative in the middle column, and time in the right column.
- Record your script using Quicktime Player (File > New Audio Recording) and the built-in microphone on the iMac.
- Drag-and-drop your sound recording onto the movie.
iMovie with added voiceover narrative
Export
Export your clip to MP4 format (Share > File > SD). Note the estimated file size, download time, and resolution.
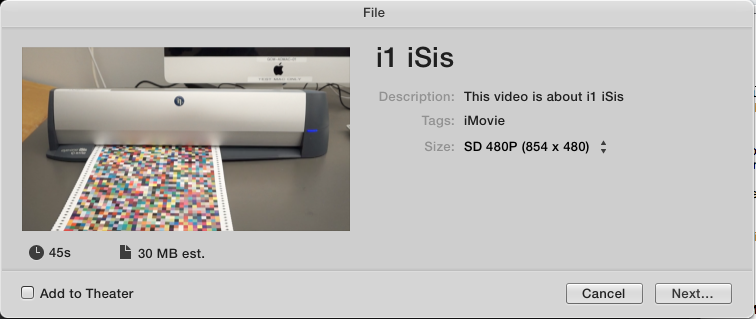
Export to standard-definition (SD) movie.
Insert in Web Page
- In Dreamweaver make a new web page and insert the video using the <video> tag:
<video src=”i1iSis.mp4″ width=”854″ height=”480″ controls></video> - Make a screen capture (CMD+SHFT+4) of the movie to use as a poster, and add this to the <video> tag:
poster=”iSisMovie.png”