Main Body
Tutorial 1 • Getting Started
Page Layout for the Web
Web pages differ from print pages in that the designer never knows what computer, device, operating system, monitor, screen, browser, or window size the reader will be using. The page size is determined by the user’s browser window, so you can only control:
- order of page elements (tags)
- tag width and height
- spacing around the tag (margin or padding)
- text wrap (“float”)

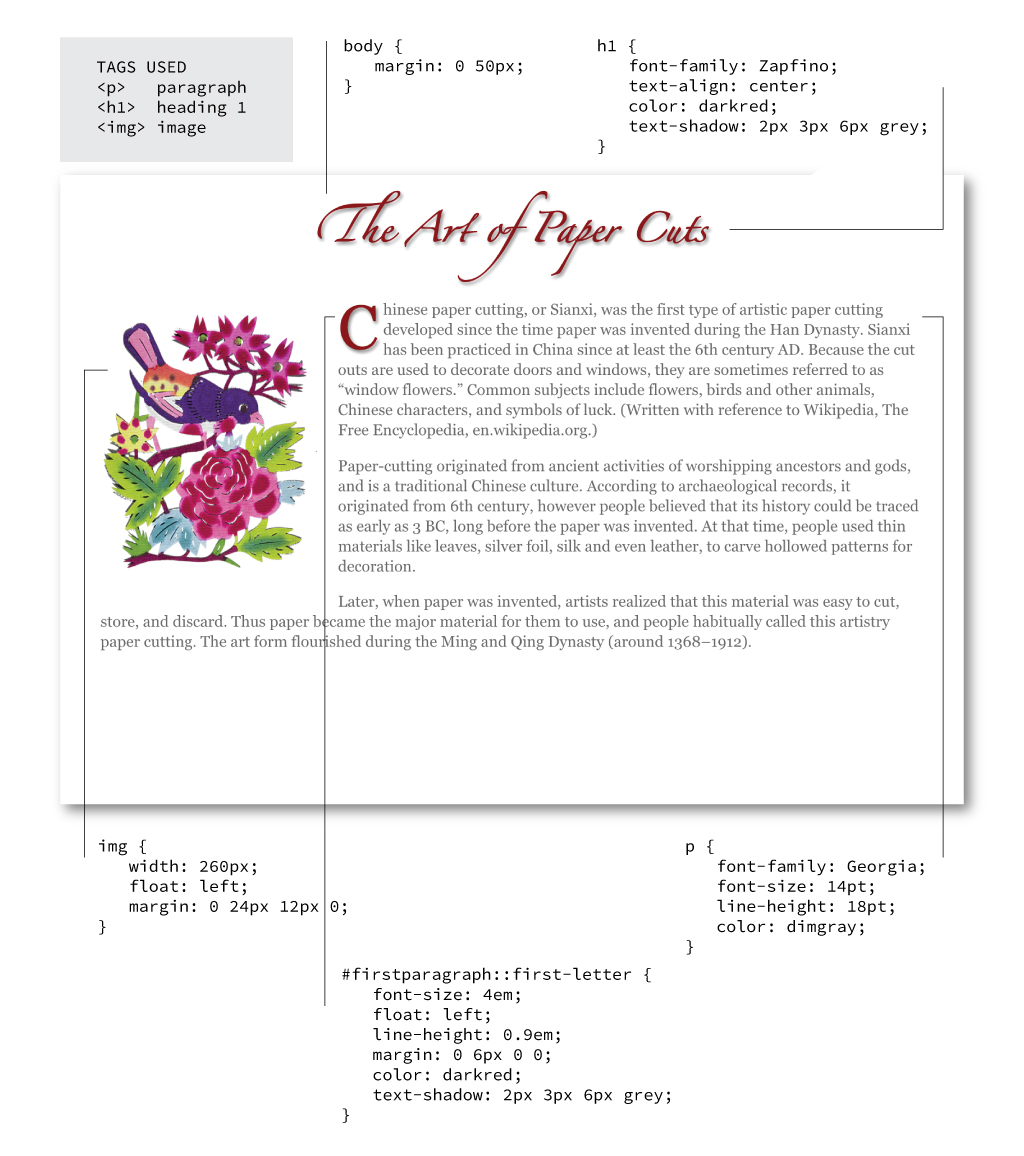
Tags
HTML. Web pages are described in the hypertext markup language (HTML) and styled using cascading style sheets (CSS). Page elements like paragraphs, headings, and images are specified in tags, enclosed in less-than and greater-than symbols, such as opening <p> and closing </p>, for paragraph. The tags are similar to highlighting, by telling where the highlight color should start and where it should end.
| Commonly Used HTML Tags | |
|---|---|
| tag | meaning |
| <p></p> | paragraph |
| <h1></h1> to <h6> | heading, h1 largest and h6 smallest |
| <img /> | image (self-closing) |
| <div></div> | division, used to create a text or picture box or to group items |
| <ul></ul> | unordered list (bullet points, each point is a <li></li> Note: <ul> and <li> are sometimes used to create menus) |
| <ol></ol> | ordered list (numbered items, each is <li></li>) |
CSS. Styles can be specified directly in the tag (“local” or “inline” styles), in the head of the document (“global” or “embedded” styles), or in a separate, linked file of type .css (“cascading style sheet”). “CSS” has two meanings: (1) the hierarchy of local/global/css and (2) a file type of .css. Styles can include size (width, height), spacing (margin, padding), font, color, background, and many other characteristics.
Inline and Block-Level Tags. “Inline” describes tags that flow one after the other, like characters in a word or words in a paragraph. Example: <img> tag. “Block-level” refers to tags that have an automatic “paragraph return” after them, so subsequent tags go to separate lines. Examples: <p>, <h1>, <li>, <div>.
W3Schools Reference. The site W3 Schools [New Window] is a handy reference for HTML tags, CSS styles, and lots of other information about the web. If you are not sure how to create a specific look, try searching the site. Example: You want to create a drop-shadow around an image. Searching for “drop shadow” will lead to an explanation of the “box-shadow” and “text-shadow” styles. Also try searching the web for “CSS drop shadow”; the first entry will probably be from W3Schools.
Writing Code in Dreamweaver
Although web sites can be created with automated web design sites and content management systems, creative designers and developers manually write HTML and CSS code to get the greatest flexibility in creative designs. Several free HTML editors are available, including SublimeText, Atom, and Brackets. In class we demonstrate in Adobe Dreamweaver because the program’s code hints and built-in browser preview simplify page creation.
The authors recommend setting up Dreamweaver in vertical “Split” view, with the code on the left and the preview on the right.

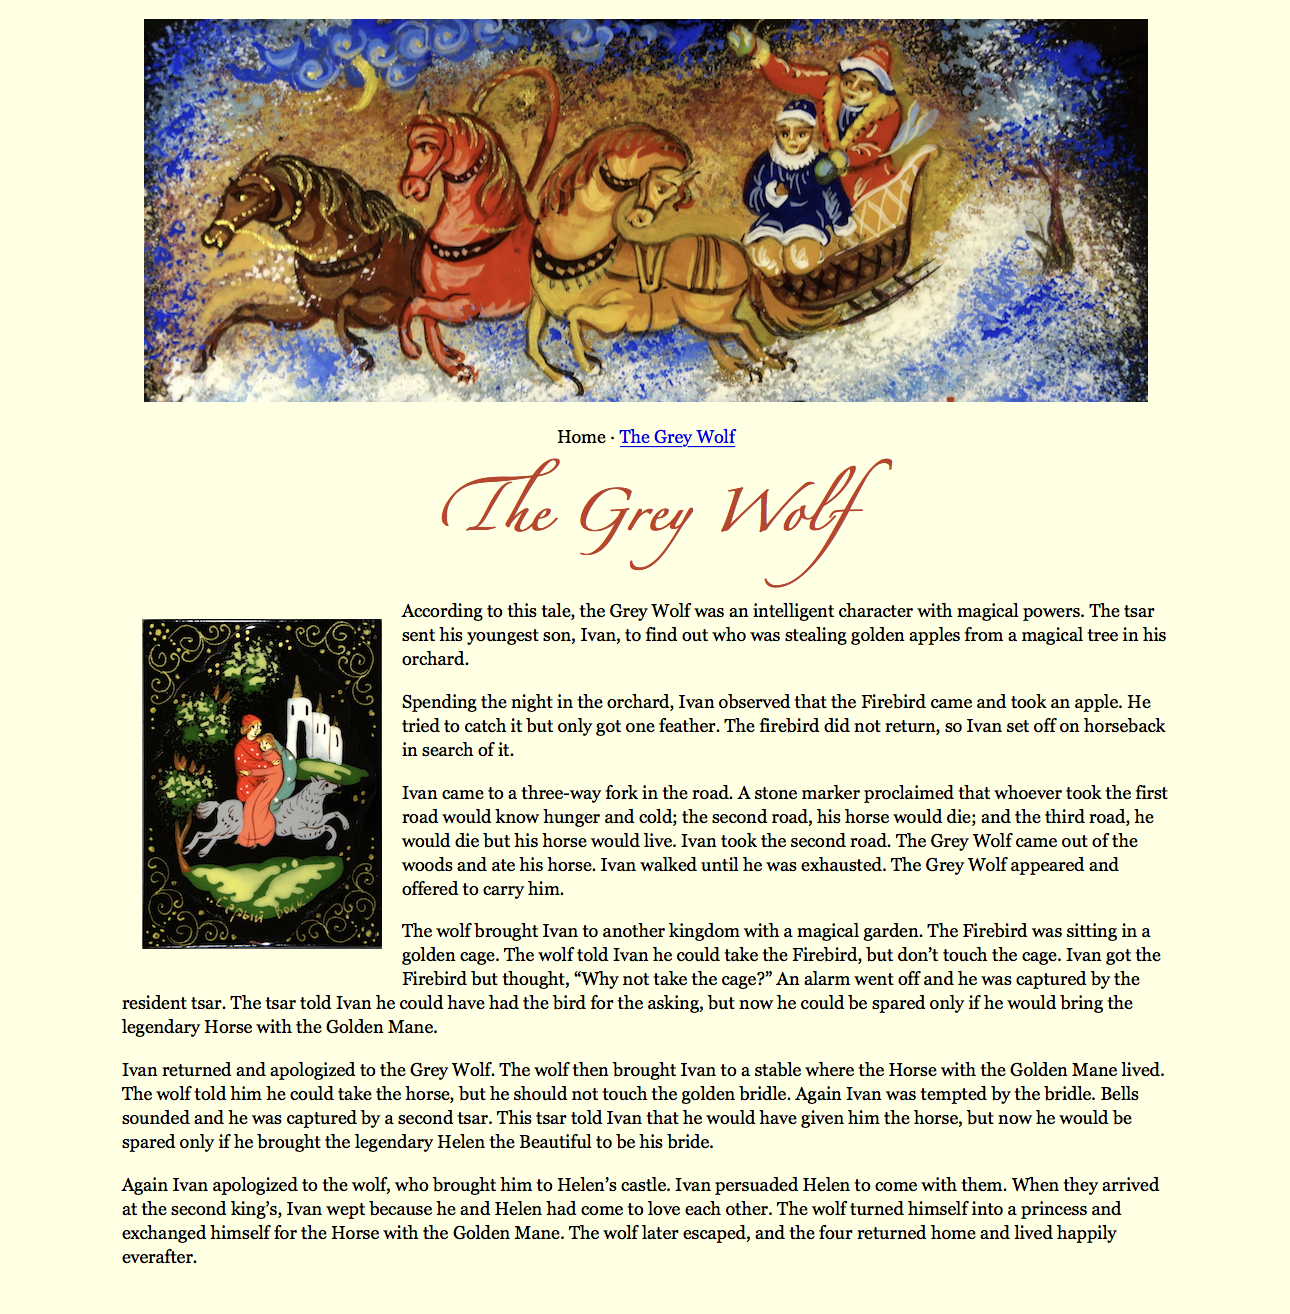
Let’s Create a Web Page
- Open the file “greywolf_START.html” in Dreamweaver and Save As “greywolf.html.”
- Insert and center Header image: images/_DSC0067_1004.jpg
- Link to Home (index.html) and The Grey Wolf (greywolf.html) using “a href” tags (e.g., <a href=”index.html”>Home</a>).
- Make “The Grey Wolf” into a heading <h1…h6>, where h1 is the biggest.
- Designate each paragraph with a <p> tag (opening and closing tags).
- Add a local or inline style to the first <p> tag and select a font you would like to use (e.g., <p style=”font-family: Georgia;”>
- Inside the <head> tag, add global or embedded opening and closing <style> tags. Inside the tags, write selectors for the tags, and style specifications in braces {}. E.g., p {font-family: Georgia;}.
- Insert image “_DSC0061.jpg” in front of paragraph, float left with 20px margin.
- Indent the text block left and right.
- Choose and measure light RGB colours from the image, and colour the header and body.
| Some Useful Styles | |
|---|---|
| style | description |
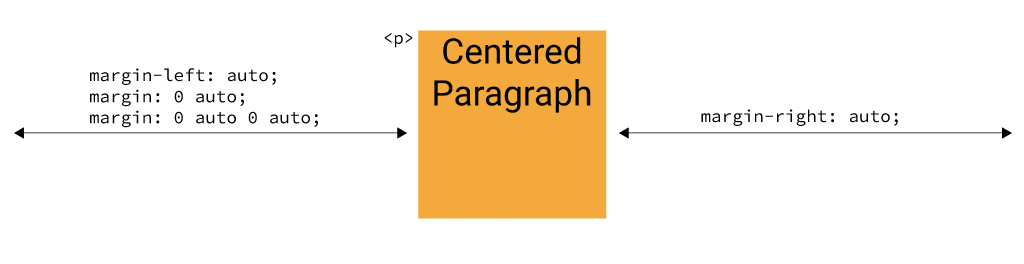
| margin: 0 auto; | center an item (tag must be block-level and browser must know width in pixels or %) |
| margin: 0 12px 6px 0; | margin puts space around objects, numbers go clockwise—top, right, bottom, left |
| padding: 0 12px 6px 0; | padding adds space from inside the object, whereas margin is space outside the object. E.g., if a tag has background: yellow, padding will expand the yellow color, while margin will not. |
| text-align: center; | centers text or anything inside <p> paragraph tags |
| font styles | • font-family: Helvetica; • font-size: 12pt; • font-style: italic; • font-weight: bold; • line-height: 1.2em; • color: dimgray; |
| max-width: 100%; | scales items to 100% of window width for “responsive design” |
| color: colorname; color: rgb(127,127,127); color: rgba(127,127,127,0.5); |
• specify color by name • specify by RGB (red, green, and blue values, 0–255), or • specify by RGBA (A is opacity, 0–1.00, i.e., 0 is transparent and 1.00 is opaque.) |
| body { width: 80%; margin: 0 10% 0 10%; } |
centers the body and puts at 10% margin around it |
How to center a tag. A common question is how to center something in a page or within another tag. The “margin: auto;” style can be used to center a block-level tag, that is, a tag with a built-in paragraph return, and of known width. These include most text tags (p, h1…h6, ul, ol) but not the img tag, which is inline. To center an image with margin: auto, the image tag must first be styled to “display: block.”
Organizing Files
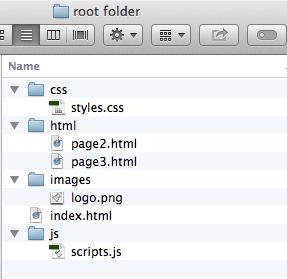 Make a “gold master” folder on your desktop, such as “site,” and place final files in it.
- Place the required .html, .css, and image files for your site into the folder.
- Follow naming conventions for convenience:
- Use all lowercase letters.
- No spaces in file or folder names — use hyphen (-) or underscore (_) to separate words.
- No absolute links to images, .css, .js, or other files (e.g., “file///MacintoshHD/images/image.jpg”) in your documents.
- Make sure your home page is called “index.html” so the file will load automatically when the folder is entered.
- If placing image, .css, and other files in folders, be sure to cite the folder name in the link. E.g., “images/image1.jpg”
- If placing .html files in a folder, remember you will have to go up one directory level to get to the index file and other folders. Use “../” before the folder name.
- Test the files to make sure all links work and there are no missing images.
- Don’t rename any files after organizing the folder.
- Upload the files to the STW > public_html folder.
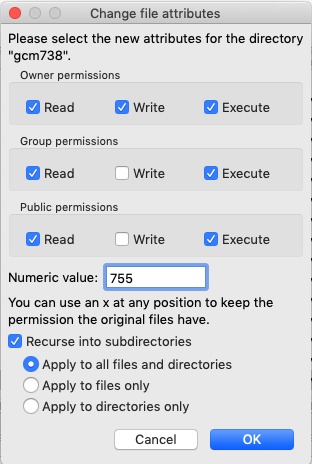
- Right-click the folder and set permissions to “755” so the public can read and execute future JavaScript but not write to your files.
- Test your site from a browser to be sure your files can be read from the web.
| FileZilla Settings for File Upload to the Server
Host: stw.ryerson.ca Port: 22 User: your short ID (see my.ryerson.ca > Manage My Online Resources > Update Owner Information) Password: same as for my.ryerson.ca |
 |
Submitting Assignments on the Server to D2L
- Place your project on the student web server (STW) and record the link.
- To submit and assignment on D2L, you have to give D2L a file, so you can:
- Create an HTML file with a link to your STW server, and submit this HTML file to D2L.
Example: <a href=“http://stw.ryerson.ca/~r3adams/challenge1”>Challenge 1</a> - Give D2L a “dummy file” (such as a screen capture of your project), then write the link in the Comments section.
- If all else fails (not preferred), compress your “site” folder with the project and upload the resulting .zip file to D2L.
- Please refrain from emailing files to the instructors or TAs, as this causes the files to get separated from the D2L assignment and your project will not get marked.
- Create an HTML file with a link to your STW server, and submit this HTML file to D2L.
Troubleshooting
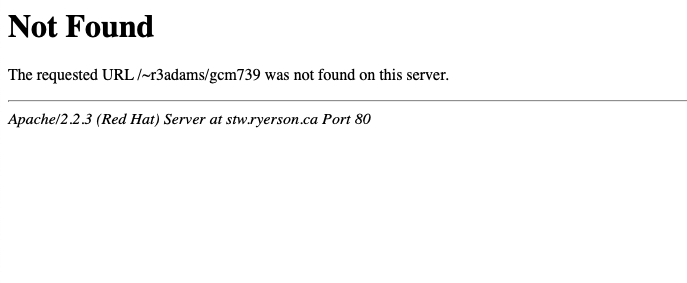
Below are three common errors encountered when attempting to view a web page on the server.
“Not Found.” The browser cannot find the page you are looking for. Check for:
- If the page(s) is/are in a folder, include the folder name in URL.
- Make sure the first file is named “index.html” (do not capitalize the “I” in “index’).
- Don’t put any spaces in any of the file names, as this confuses the server. If necessary, separate words with hyphens or underscores.
“Forbidden.” Permissions have not been set to enable the public to see your files.
- In FileZilla, right-click > Set Permissions as shown in the screen capture, i.e., set Public permissions to “Read” and “Execute” (JavaScript).
 |
|
| Set File Permissions to allow the public to view your files and interact with any Javascript they contain. | |
Missing Photo. The path to the photo has not been properly described in the <img> tag.
- If you put images in a folder, specify the folder name in the image link, e.g., <img src=”folder/image.jpg”>.
- Be sure photos are not set with absolute links, which will default in Dreamweaver if you haven’t saved your HTML document before importing images, e.g., file:///MacHD/Users/richardadams/Desktop/image.jpg. Instead, set image links to be relative, e.g., image.jpg or folder/image.jpg.