
Main Body
Chapter 1 • Simple Page
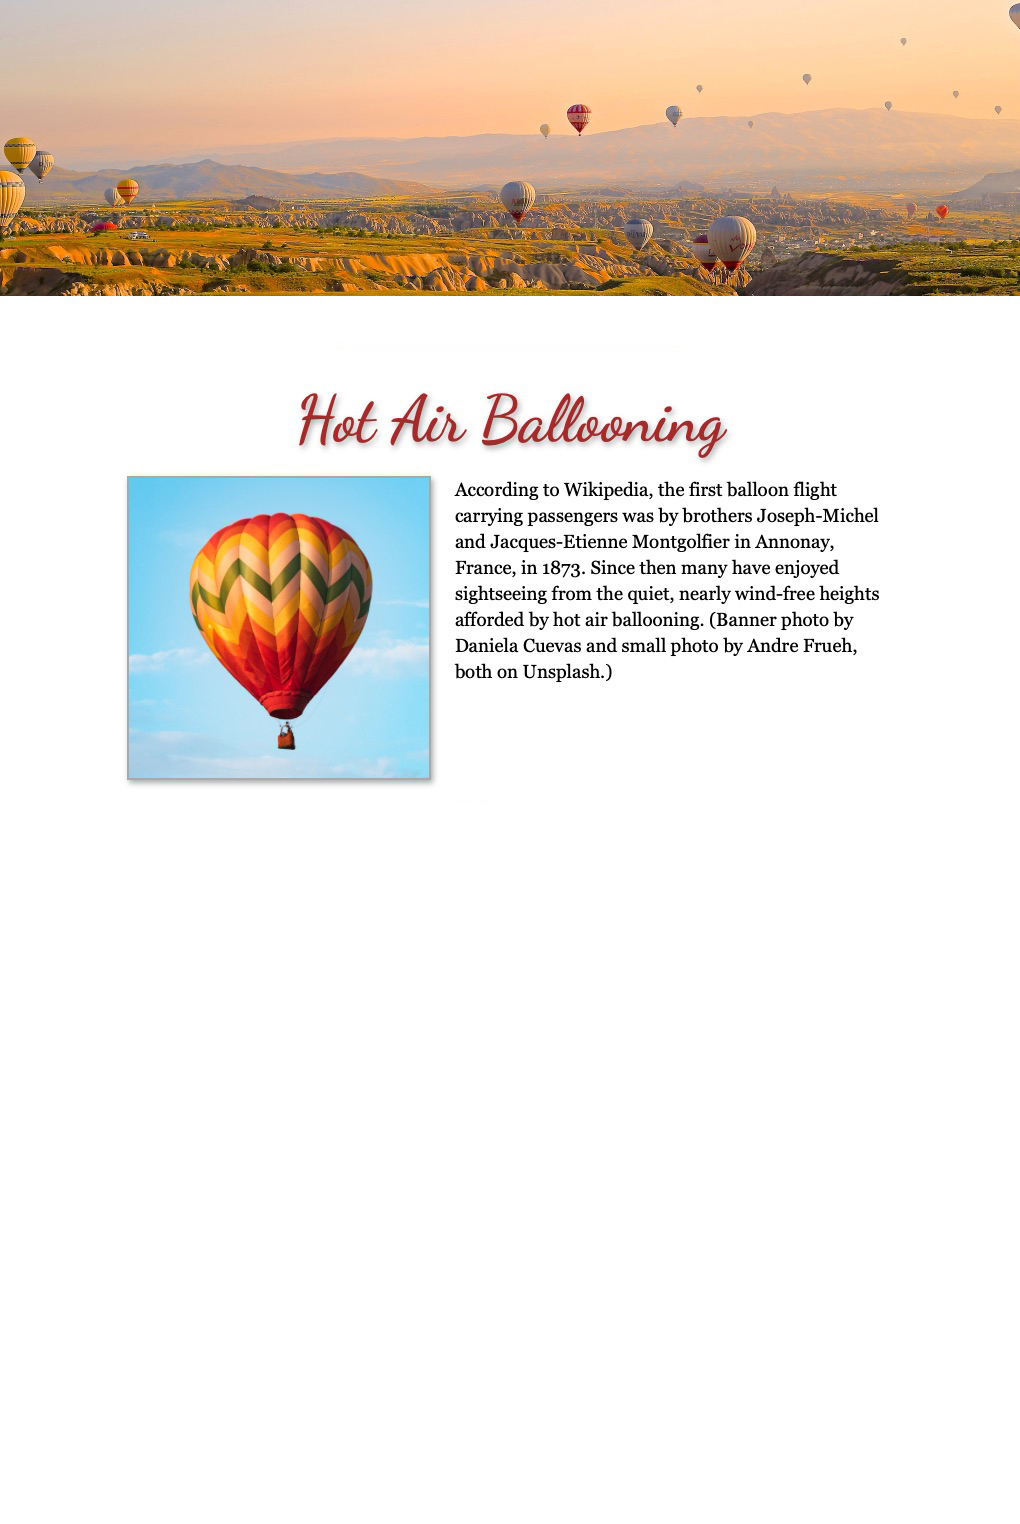
Let’s create a basic web page that includes some text, some images, and a heading (Figure 1-1).
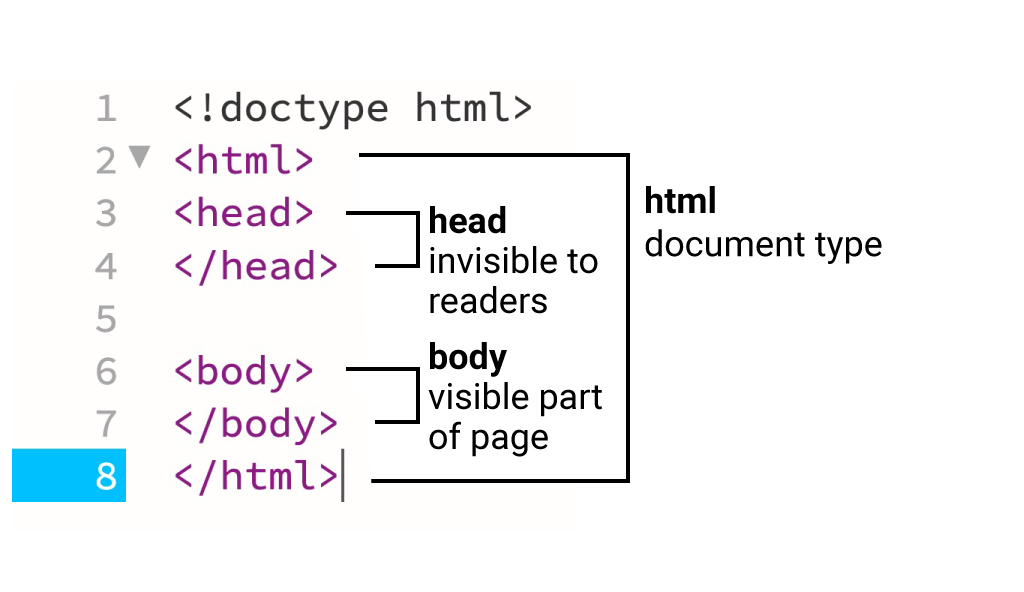
If you open a new document in Adobe Dreamweaver or another HTML-editing program, you will see that the basic parts of the page include opening and closing tags <html>, <head>, and <body> (Figure 1-2). Of these tags:
- <html> refers to the entire document
- <head> is the area invisible to readers and includes <meta> tags, the page <title> (appears in browser tabs), and possibly an embedded or global <style> tag.
- <body> is the area visible to readers. An HTML document may include only one of each of these tags. When copying and pasting code, be careful that you don’t wind up with more than one of each.
Procedure
HTML Tags
- Choose a topic of interest to you.
- Gather some text and images for the page. Write a couple of paragraphs about the topic, or generate some text with an AI chat program, or find some text on the internet. Look for two images on a royalty-free photo site, one to use as a banner and another to place in the text. Place the text and images in a folder.
- Open a new Dreamweaver document and save in .html format in your folder.
- Using opening and closing <div> grouping tags, create a fixed-with page that’s e.g. 928px wide by 1228px high.
- Place the text into the Dreamweaver document, surrounding each paragraph with opening <p> and closing </p> tags.
- Place the banner image at the top of the page. (The <img> tag does not close, meaning there is no </img> ending tag. Instead, place the closing slash at the end of the tag.) Your tag should read, for example, <img src=”banner.jpg” />. Do not use Dreamweaver’s “Browse” function; if this option appears, it means you haven’t saved the .html document into the same folder as the images. The image tag should only include the file name and not a long directory path that goes to your computer, because obviously your computer will not be accessible on the web.
- Add an id to the banner <img> tag to differentiate it from the text image, e.g., <img id=”banner” src=”banner.jpg” />.
- Title your page using opening and closing heading <h1> tags, e.g., <h1>Hot Air Ballooning</h1>
- Place the other image in front of the paragraph using the non-closing <img> tag. Add a class to the text image to differentiate it from the banner image, e.g. <img class=”text-image” src=”image.jpg”.
Styling Your Tags
- Add an embedded, or global, <style> tag to the <head> of your document. Add selectors for the body, div, h1, p, #banner (# for the id), and .text-image (. for the class), and style as in the table below.
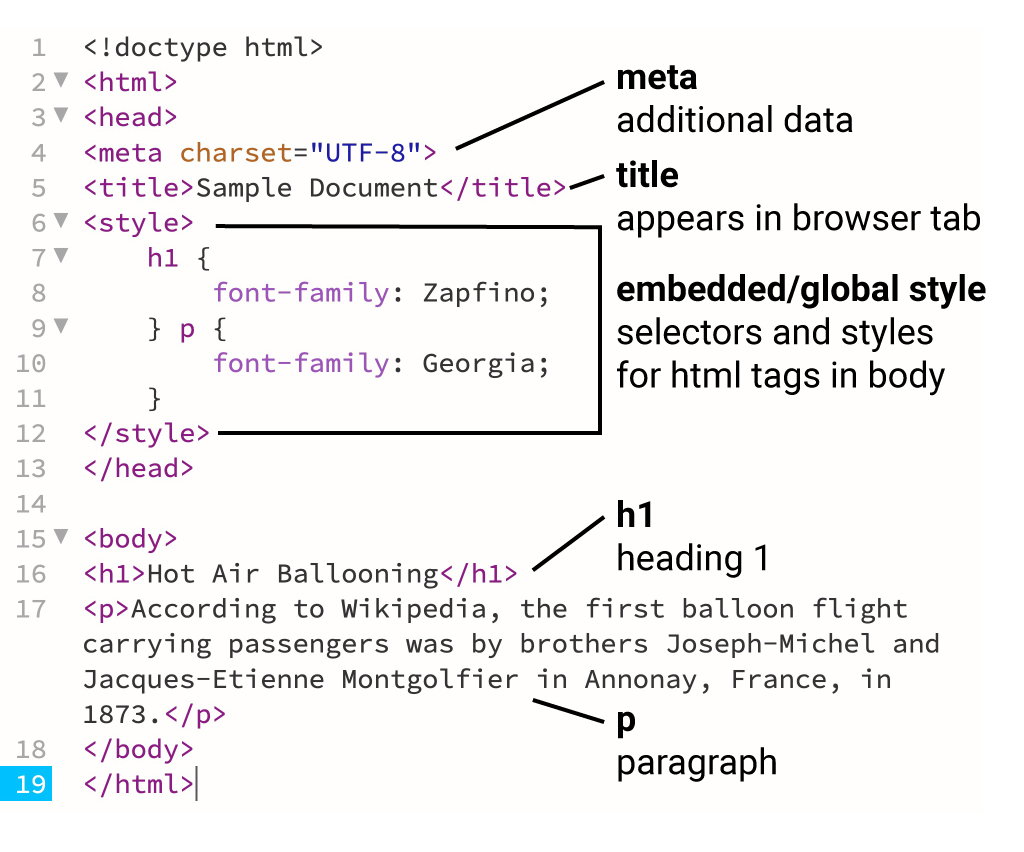
- The screen capture below (Figure 1-3) shows the code for the partially completed page that includes styles and tags for the text.
| Selectors and Styles for Demo Document |
|
| Selector | Style |
| body | background: whitesmoke; /* sets body color to light gray */ |
| div | width: 928px; height: 1228px; background: white; margin: 0 auto; /* centers the page in the body */ |
| h1 | font-family: Zapfino, cursive; text-align: center; |
| p | font-family: Georgia, serif; font-size: 14pt; width: 768px; margin: 0 auto; |
| #banner | width: 100%; |
| .text-image | width: 384px; float: left; /* creates a text wrap */ |
| Note: the expressions enclosed in /* and */ are comments to explain the style. Comments are invisible to browsers. | |
Uploading to the Web
- Open your HTML file in a browser. Preflight the file by checking that all images appear and that the text is in the chosen font.
- Upload your file and accompanying images and fonts to the server.
- Open your URL in a browser and preflight again.
Inline and Block Elements
Repeating tags that are by default inline (e.g., <img>, <video>) will display horizontally across the page and then wrap to the next line, while those that are by default “block” have an automatic paragraph return after them and will display vertically. The default display can be changed with the style “display,” e.g., to set images to line up vertically, style them as “display: block;” or to get paragraphs to line up horizontally, style them to “display: inline;”.
| Common Tags for Text | |
| <p> | paragraph |
| <h1>…<h6> | heading 1 through 6 (1 is largest, 6 smallest) |
| <pre> | preformatted text, usually defaults to monospace, used for code |
| <span> | designates an area of text to style differently, e.g., a drop-cap, different color, etc. |
| <sidebar> | These two text tags, <sidebar> and <aside>, can be set to narrower width and styled with a different font, background, border, drop-shadow, and other effects to create sidebars and pull quotes. |
| <aside> | |
| <details> | Text in the <details> tag will be hidden except for the included <summary>. A dropdown arrow enables readers to spill out the text. |
Using the Web Inspector
If you see a web page that you like, you can see the underlying code using your browser’s Web Inspector.
| Browser | Web Inspector |
| Chrome | View > Developer > View Source |
| Firefox | Tools > Browser Tools > Page Source |
| Safari | (Turn on Develop mode in Settings > Advanced) Develop > Show Web Inspector |
Reference Document
Simple Page: rich-adams.net > Demo Site > Home
Simple Page: rich-adams.net > Completed Tutorials > Home
