
Glossaries
Glossaries in Pressbooks
Glossary Features and Displays
You can use the Glossary tool to add glossary terms to your webbook, or to generate a full glossary list for all formats.
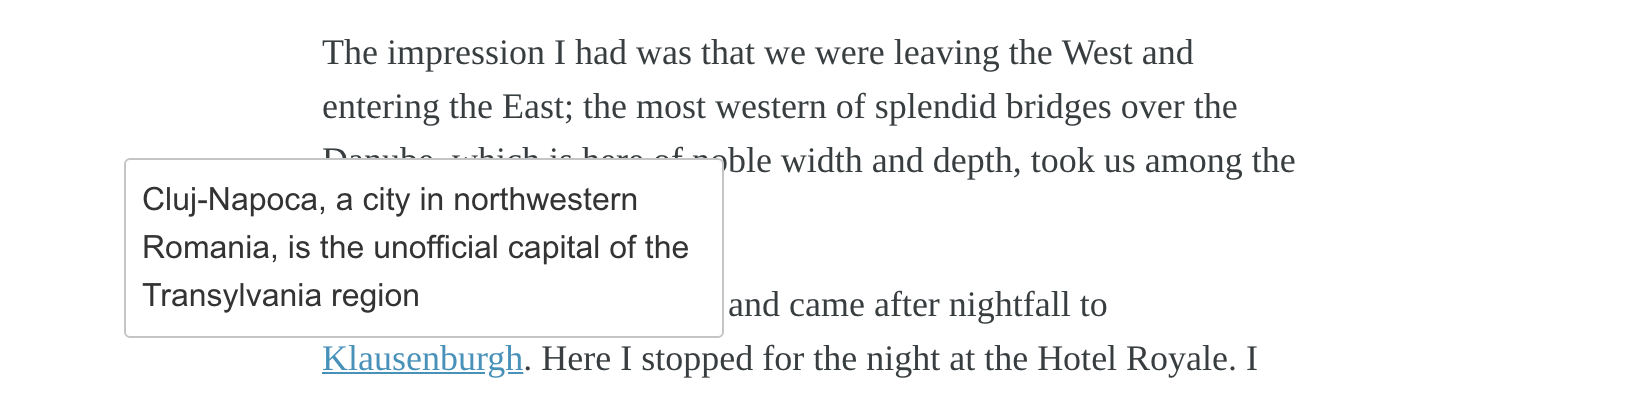
Glossary terms are underlined in your Pressbooks webbook, and display the term definition in a tooltip when clicked.
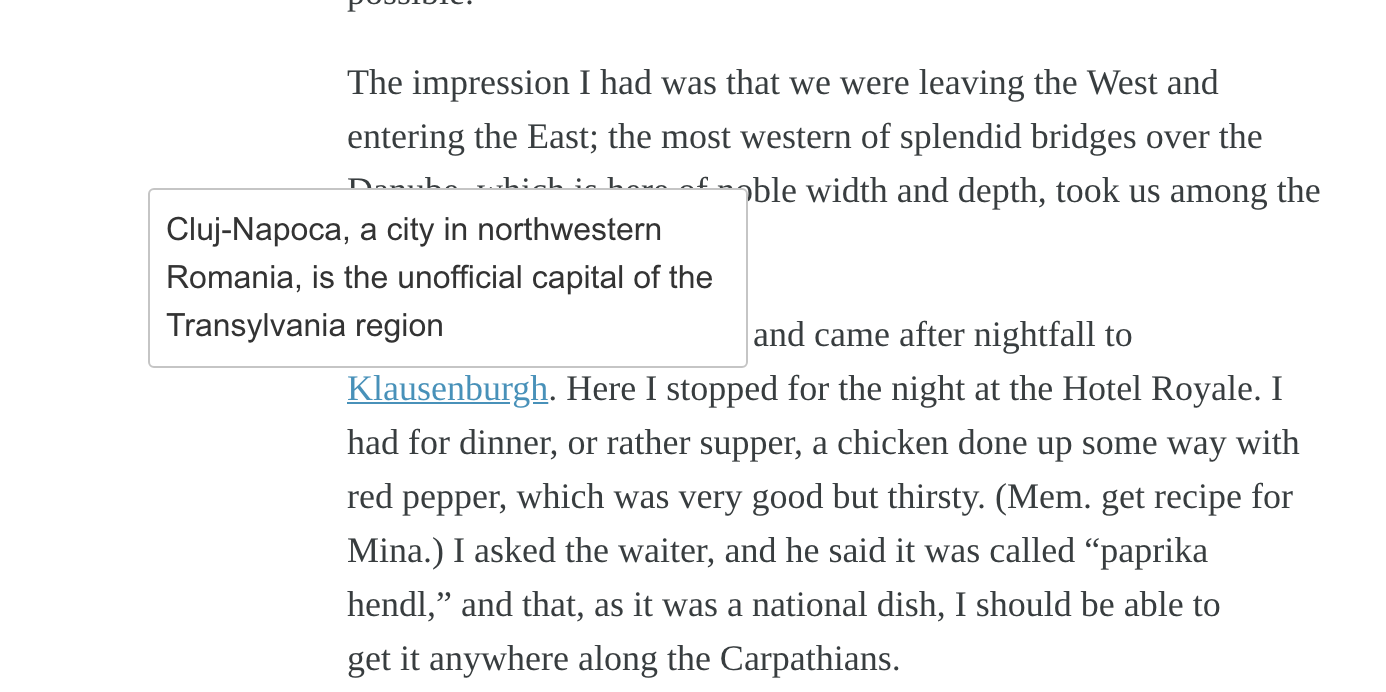
Users can click the term again or press the esc (escape) key on their keyboard to close the tooltip. The tooltip will also close if the user clicks another glossary term on the page.
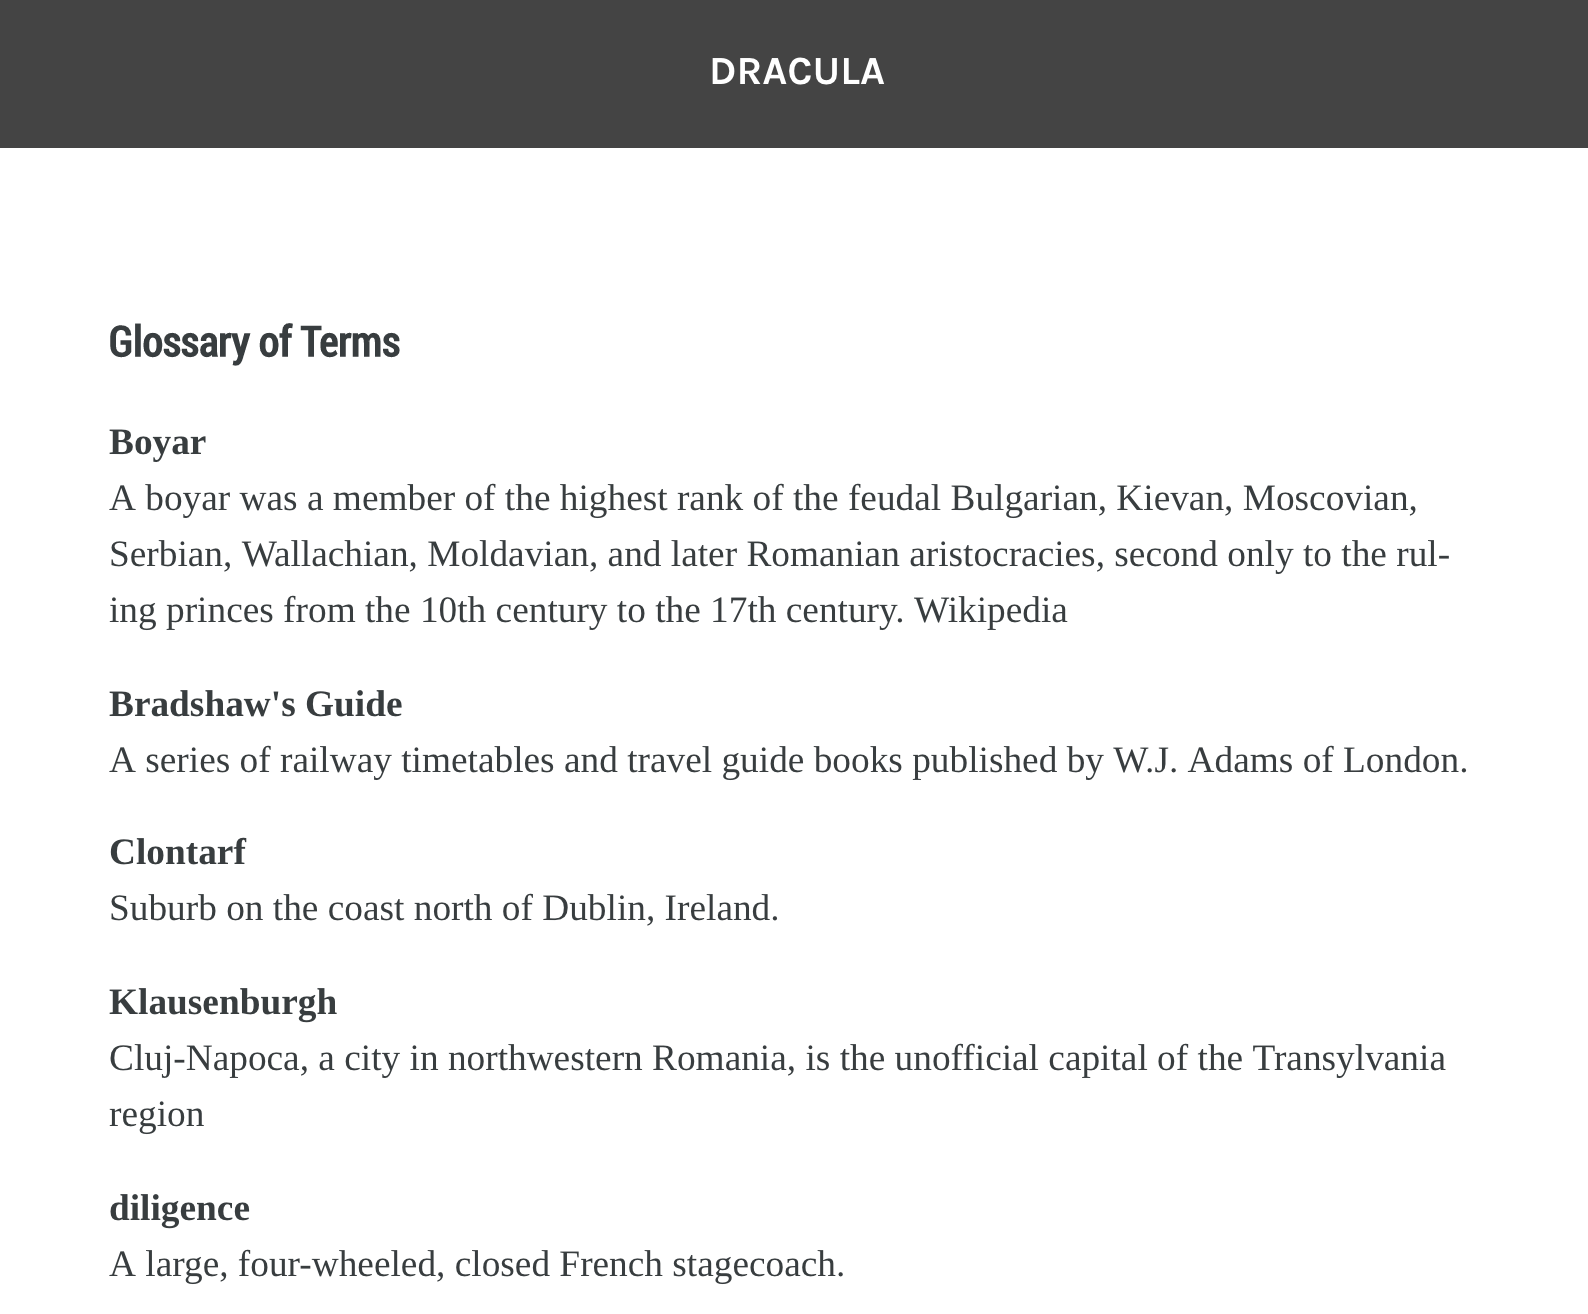
The glossary list displays in all supported formats: webbook, PDF, digital PDF, EPUB, and MOBI. The glossary list is a consolidated, alphabetized list of all glossary terms which have been selected to show in the glossary list. The design of the glossary list is dependent on the theme.
Create a Glossary Term
There are two methods to creating a glossary term. You can either create your terms on the Glossary Terms page before you place them in your book, or you can create the terms directly from inside the content editor of your chapter, front matter, or back matter.
From the Content Editor
To create a glossary term:
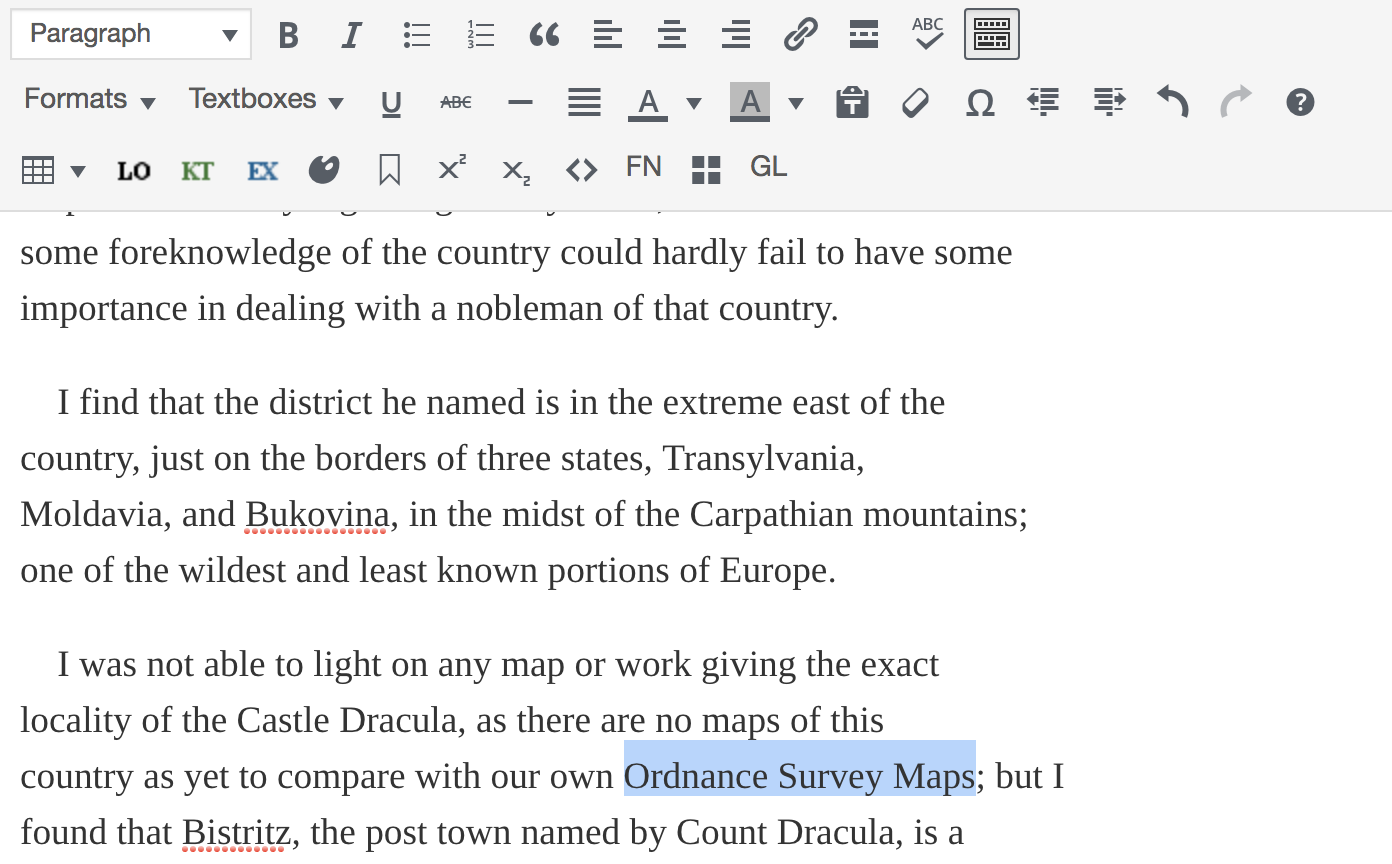
- Highlight a word that you want to add a glossary term for, or place your cursor where you want the glossary term you have not yet entered to appear
- Click GL on the Visual Editor toolbar. The Glossary Terms

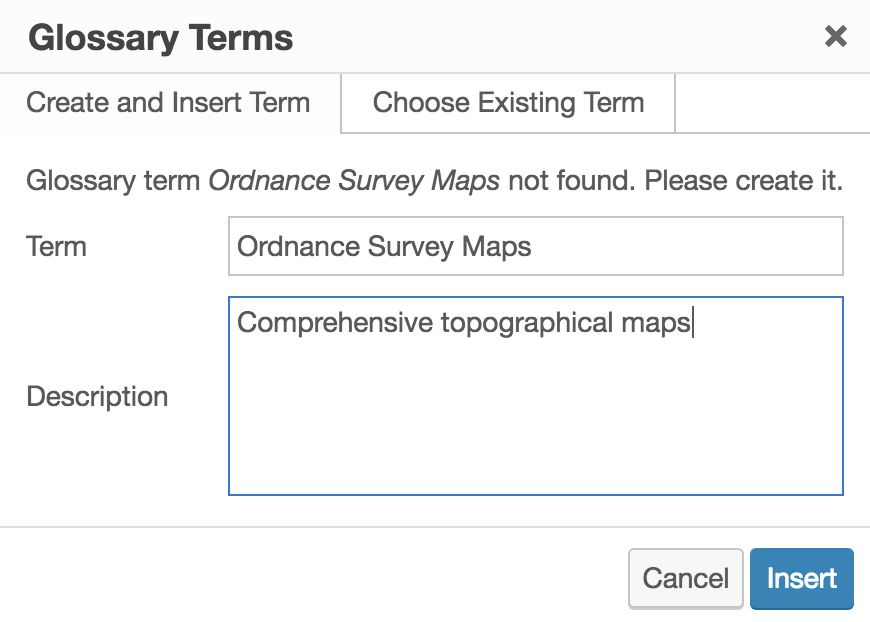
interface will appear - On the Create and Insert Term tab, enter your term (NOTE: If you’ve highlighted a word, that word will automatically populate the Term field)
- Add the description for the term
- Click Insert
A shortcode will be inserted for your glossary term. If you’ve highlighted an existing term to give it a definition, the shortcode will wrap around the term. If you’ve created a new word while adding the glossary term, that word will appear wrapped in the glossary term shortcode.

The shortcode is visible in the visual editor, but is displayed as a functional tooltip in your webbook.
NOTE: Glossary terms inserted with this method will show in glossary lists by default. To remove the term from the full glossary list:
1. Go to Organize > Glossary Terms
2. Select the term to access the “Edit Glossary Term” page
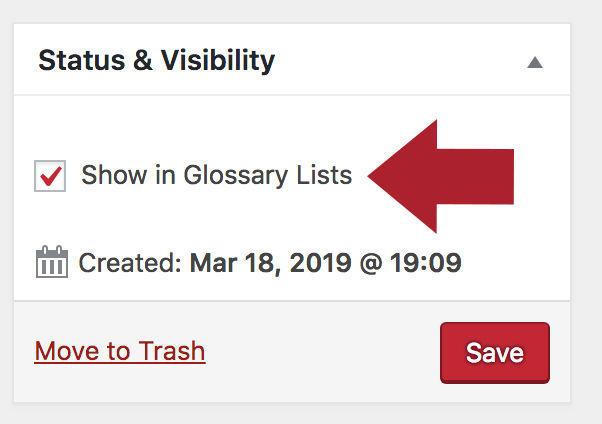
3. In the “Status & Visibility” menu, deselect “Show in Glossary Lists”
4. Save your changes
From the Glossary Terms page
To create a term:
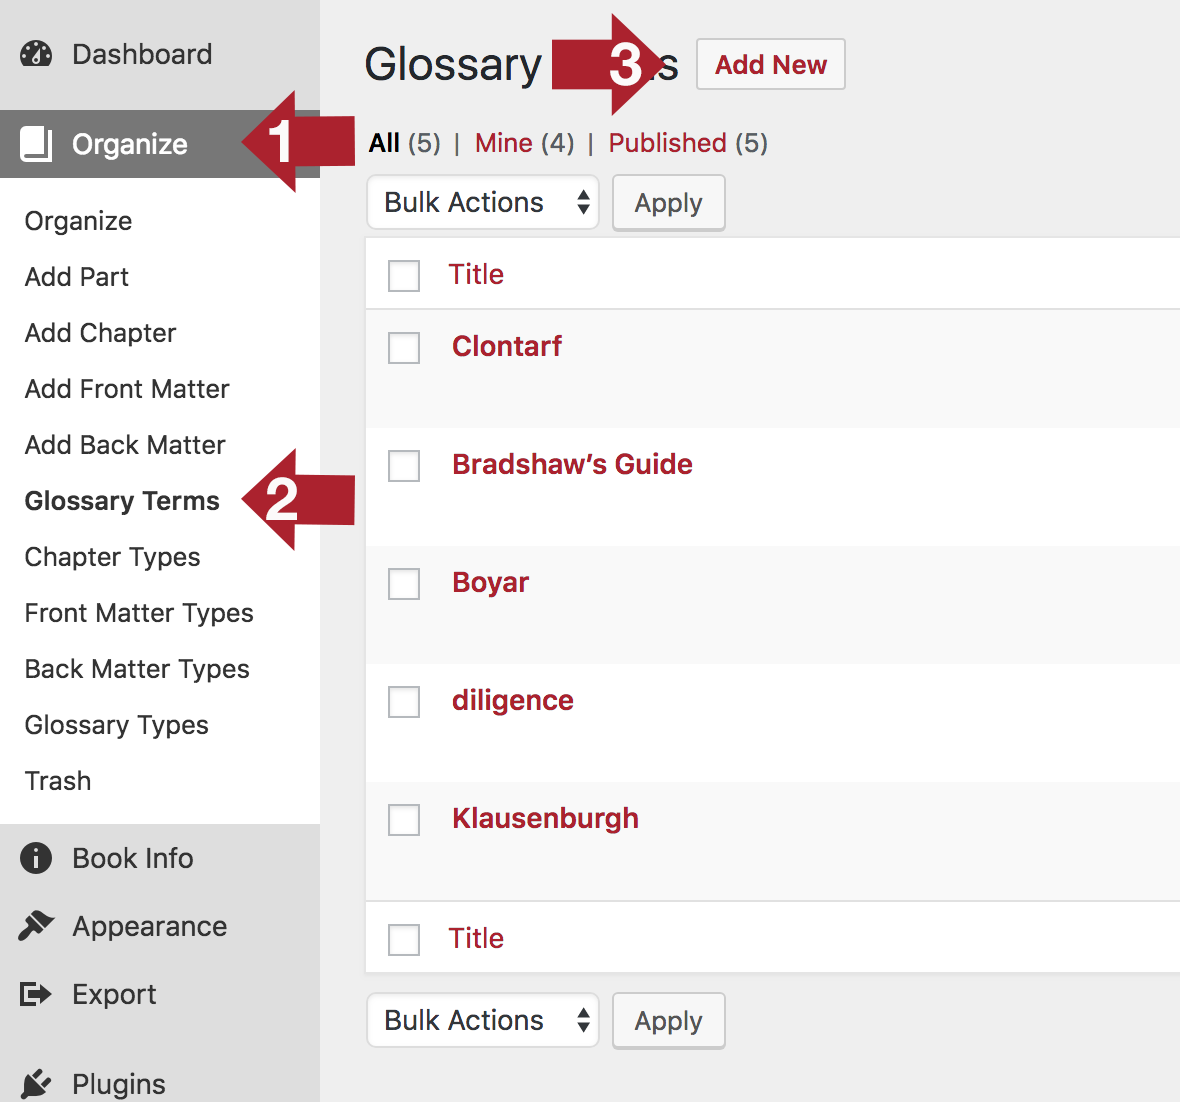
- Hover over Organize in the left sidebar menu of Pressbooks
- Click Glossary Terms
- Click Add New

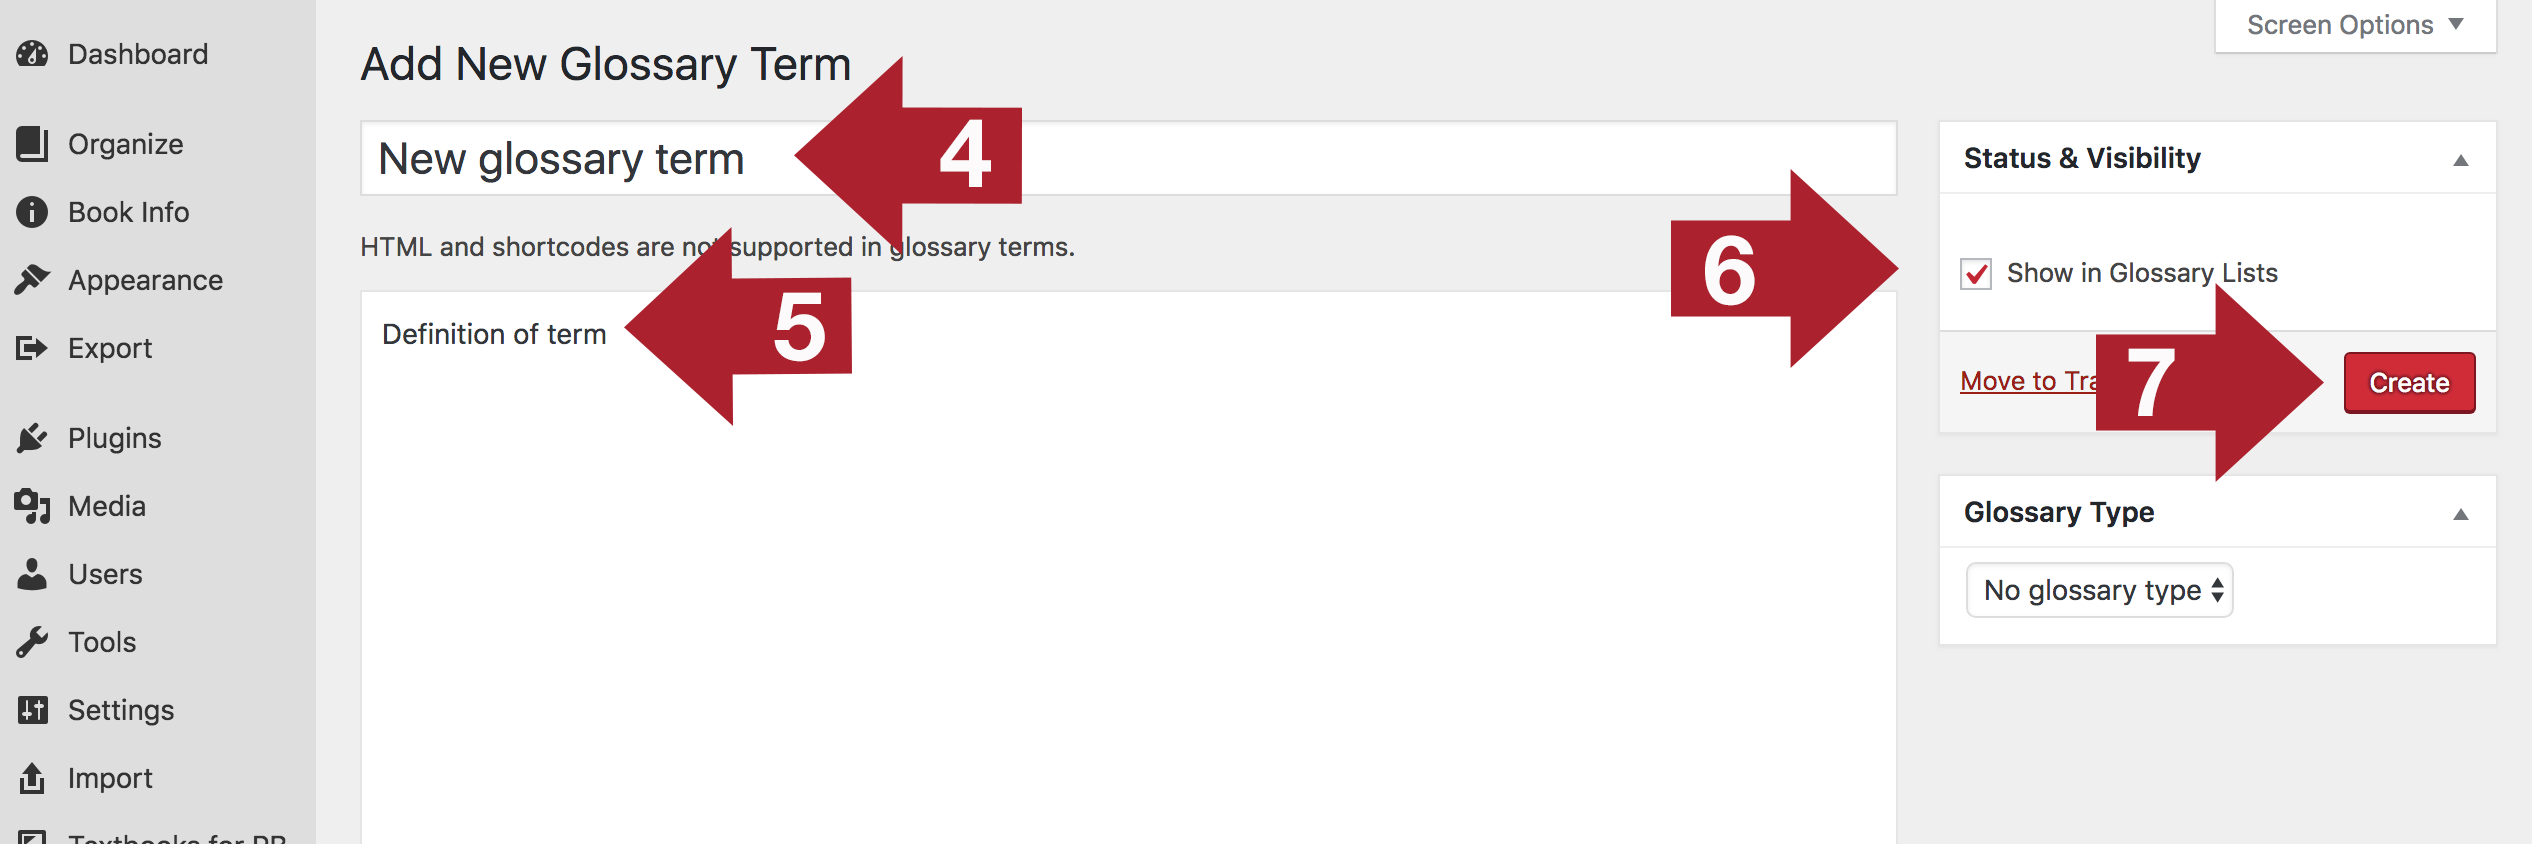
- Enter a title for your term
- Create a definition for the term
- Determine whether or not the term should “Show in Glossary List”
- Click Create

After the term has been created, it can be placed in the content editor. Follow these steps:
- Highlight the word you are applying the existing glossary term, or place your cursor where you want the term to appear
- Click GL on the Visual Editor toolbar to open the Glossary Terms interface
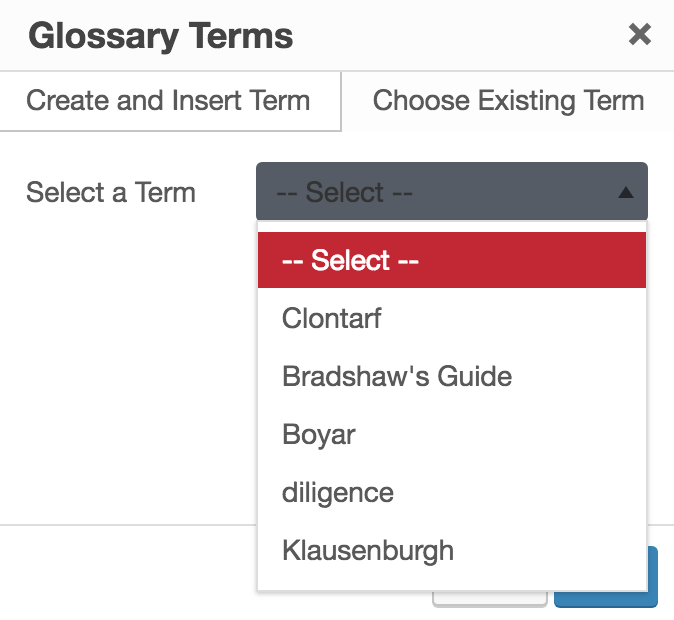
- Select the Choose Existing Term tab
- Select the term from the dropdown menu (NOTE: If the text you’ve highlighted matches the name of an already existing term, the interface will automatically open to the Choose Existing Term tab with the matching term selected)
- Click Insert

Create a Glossary List
A Glossary List will contain all listed glossary terms you’ve created for your book. By default, all terms will be listed. You can choose whether or not a term is listed when creating a new glossary term through the Glossary Terms page, or when editing any existing glossary term. To exclude a glossary term in your glossary list, uncheck “Show in Glossary List” in the Status & Visibility menu on the glossary term editor page, then save your changes. To include a term in the glossary list, leave this box checked.
You can see a list of all terms and their listed or unlisted status by going to Organize > Glossary Terms from the left sidebar menu of your Pressbooks dashboard.

To generate the glossary list, follow these steps:
- Go to Organize
- Add a Back Matter chapter to your book
- In the Back Matter Type menu, select “Glossary”
 You should see the following message appear at the top of your screen: “To display a list of glossary terms, leave this back matter’s content blank.”

- Add a title to the back matter chapter
- Click Create
The glossary list will be generated and displayed in all supported export formats, as well as the webbook.
Glossary Types
On the “Edit Glossary Term” menu, you’ll notice a menu named “Glossary Type.”

Pressbooks does not support different Glossary Types at this time, and recommends leaving this menu set to “No glossary type.” However, this functionality may be expanded in future versions of the Glossary tool.
This chapter was adapted from Pressbooks Users Guide Chapter 12 by Book Oven Inc. (PressBooks.com) which is licensed under a Creative Commons Attribution 4.0 International License. Examples have been edited for the Ryerson context.
