Caution!: Actions taken using the TouchUp Reading Order tool and Order Panel cannot be undone and in some cases Acrobat may misinterpret your intentions. Remember to save your work frequently! If you frequently create PDF files you might consider using one of these accessible PDF support tools.
If tags are missing, then they must be added. When tags are present, they should still be checked for correctness and edited as needed.
Touch Up Reading Order Tags
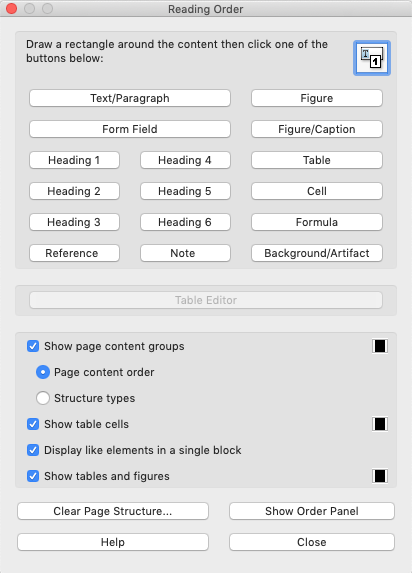
The TouchUp Reading Order dialog box offers some basic document tag options. Acrobat’s Help text describes the tags as follows:
- Text
- Tags the selection as text.
- Figure
- Tags the selection as a figure. Text contained within a figure tag is defined as part of the image and is not read by screen readers, though alternate text defined for the figure is read out.Note: An effective way of handling very complex text constructs (e.g. flow charts) is to group it all as a figure and then provide a unified alt text description for the entire group.
- Form Field
- Tags the selection as a form field.
- Figure/Caption
- Tags a selected figure and caption as a single tag. Any text contained in the tag is defined as a caption. Useful for tagging photos and captions and preventing caption text from being incorrectly added to adjacent text blocks. Note: Unless the caption actually describes the image, the figures will still require alternate text.
- Heading 1, Heading 2, Heading 3
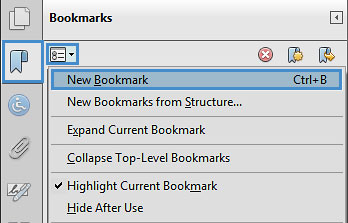
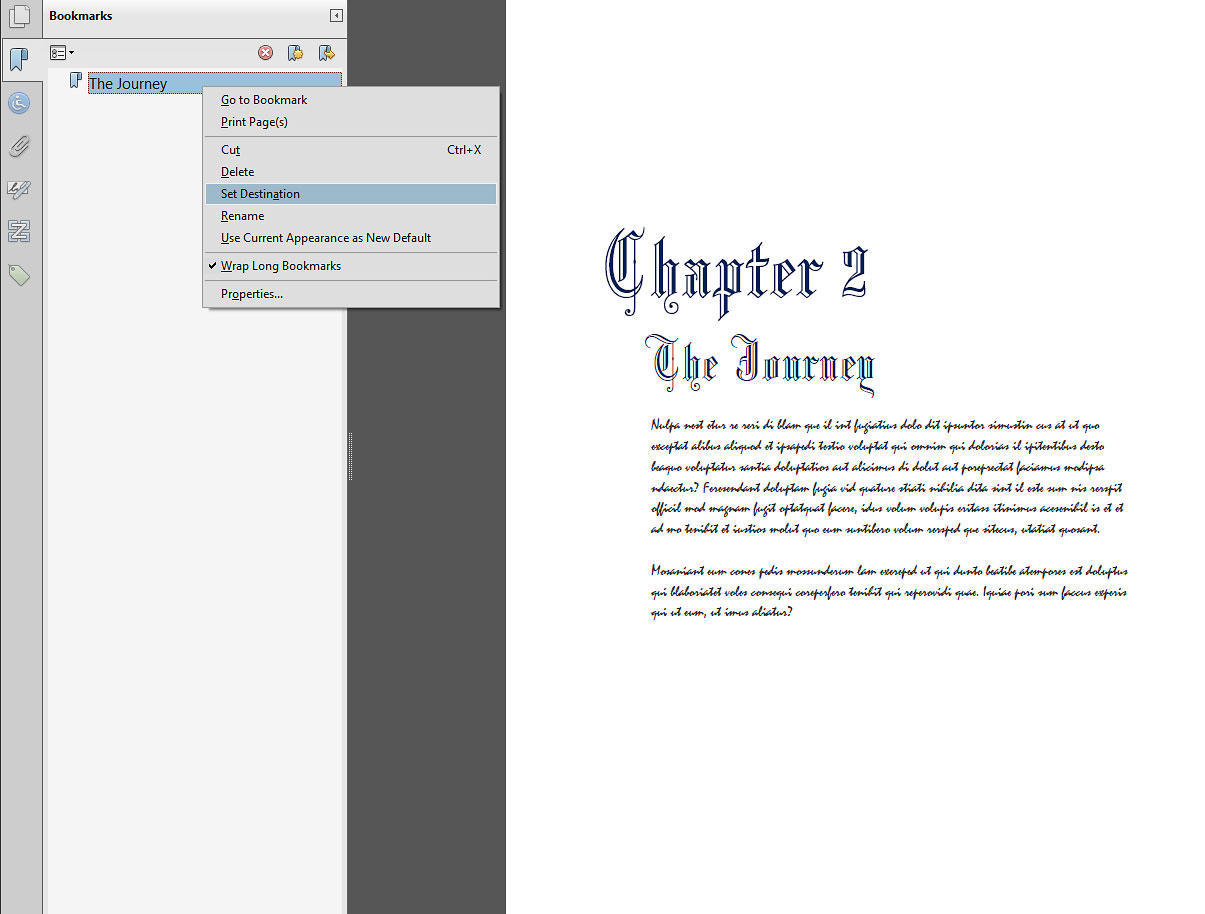
- Tags the selection as a first, second, third, fourth, fifth, or sixth level heading tag. You can convert heading tags to bookmarks to help users navigate the document.
- Table
- Tags the selection as a table. When this selection is made, Acrobat analyzes the selection to determine the location of headings, columns, and rows.
Note: Table editing can be especially challenging. Try to keep them as simple as possible in the source document.
- Cell
- Tags the selection as a table or header cell. Use this option to merge cells that are incorrectly split.
Note: Table editing can be especially challenging. Try to keep them as simple as possible in the source document.
- Formula
- Tags the selection as a formula. Note: Because speech software may handle formula tags differently from normal text, you should still add alternate text.
- Background
- Tags the selection as a background element, or artifact, removing the item from the tag tree so that it does not appear in the reflowed document and is not read by screen readers.
Additional Tags
Not all tags are available using the TouchUp Reading order dialog window. Additional tags can be accessed from the Tags pane. See the Editing tags using the Tags pane section for more information.
Document Section Tags
There are additional tags that help define semantic and structural file elements in more detail. The Adobe Acrobat website categorizes and defines all standard tags as follows (some appear in the section above):
- Container elements
- Container elements are the highest level of element and provide hierarchical grouping for other block-level elements.
- Document
- Document element. The root element of a document’s tag tree.
- Part
- Part element. A large division of a document; may group smaller units of content together, such as division elements, article elements, or section elements.
- Div
- Division element. A generic block-level element or group of block-level elements.
- Art
- Article element. A self-contained body of text considered to be a single narrative.
- Sect
- Section element. A general container element type, comparable to Division (DIV Class=”Sect”) in HTML, which is usually a component of a part element or an article element.
Heading and Paragraph Elements
Heading and paragraph elements are paragraph-like, block-level elements that include specific level heading and generic paragraph (P) tags. A heading (H) element should appear as the first child of any higher-level division. Six levels of headings (H1 to H6) are available for applications that don’t hierarchically nest sections (See TouchUp Reading Order Tags section above for more).
Label and List Elements
Label and list elements are block-level elements used for structuring lists.
- L
- List element. Any sequence of items of similar meaning or other relevance; immediate child elements should be list item elements.
- LI
- List item element. Any one member of a list; may have a label element (optional) and a list body element (required) as a child.
- LBL
- Label element. A bullet, name, or number that identifies and distinguishes an element from others in the same list.
- LBody
- List item body element. The descriptive content of a list item.
Special Text Elements
Special text elements identify text that isn’t used as a generic paragraph (P).
- BlockQuote
- Block quote element. One or more paragraphs of text attributed to someone other than the author of the immediate surrounding text.
- Caption
- Caption element. A brief portion of text that describes a table or a figure.
- Index
- Index element. A sequence of entries that contain identifying text and reference elements that point out the occurrence of the text in the main body of the document.
- TOC
- Table of contents element. An element that contains a structured list of items and labels identifying those items; has its own discrete hierarchy.
- TOCI
- Table of contents item element. An item contained in a list associated with a table of contents element.
Table Elements
Table elements are special elements for structuring tables.
- Table
- Table element. A two-dimensional arrangement of data or text cells that contains table row elements as child elements and may have a caption element as its first or last child element.
- TR
- Table row element. One row of headings or data in a table; may contain table header cell elements and table data cell elements.
- TD
- Table data cell element. A table cell that contains non-header data.
- TH
- Table header cell element. A table cell that contains header text or data describing one or more rows or columns of a table.
Inline-Level Elements
Inline-level elements identify a span of text that has specific formatting or behavior. They are differentiated from block-level elements. Inline-level elements may be contained in or contain block-level elements.
- BibEntry
- Bibliography entry element. A description of where some cited information may be found.
- Quote
- Quote entry element. An inline portion of text that is attributed to someone other than the author of the text surrounding it; different from a block quote, which is a whole paragraph or multiple paragraphs, as opposed to inline text.
- Span
- Span entry element. Any inline segment of text; commonly used to delimit text that is associated with a set of styling properties.
Special Inline-Level Elements
Similar to inline-level elements, special inline-level elements describe an inline portion of text that has special formatting or behavior.
- Code
- Code entry element. Computer program text embedded within a document.
- Figure
- Figure entry element. A graphic or graphic representation associated with text.
- Form
- Form entry element. A PDF form annotation that can be or has been filled out.
- Formula
- Formula entry element. A mathematical formula.
- Link
- Link entry element. A hyperlink that is embedded within a document. The target can be in the same document, in another PDF document, or on a website.
- Note
- Note entry element. Explanatory text or documentation, such as a footnote or endnote, that is referred to in the main body of text.
- References
- Reference entry element. A citation to text or data that is found elsewhere in the document.
To add tags automatically
Note: The automatic tagging feature may be sufficient on simple layouts, but it sometimes misinterprets the structure and reading order of complex page elements (e.g. closely spaced columns, irregular text alignment, and tables without borders.). Therefore, use the automatic tagging feature as a starting point, and always manually check and edit the tags as explained below.
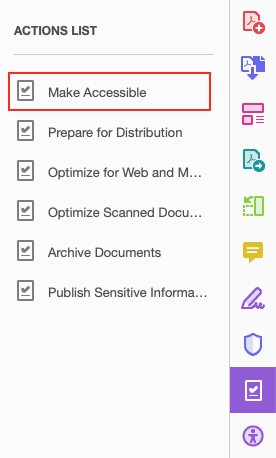
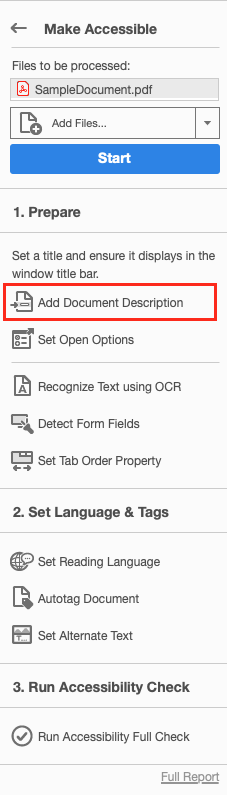
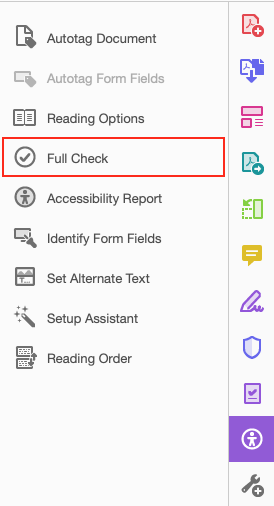
- Go to menu item: Tools > Accessibility > Add Tags To Document
*To Show the hidden “Accessibility” drop down menu Go to menu item: View > Tools > Accessibility
Note: This command removes any tags that were in the document before the command was run. If any potential problems were encountered, an Add Tags Report appears in the navigation pane.
To add/edit tags manually
There are two ways of adding and editing tags in Adobe Acrobat. You can either do it through the TouchUp Reading Order dialog box, or using the Tags navigation pane.
Note: Some tag types are not available through the TouchUp Reading Order dialog box. For documents with complex layouts and elements, use it together with the Tags pane method described below.
Adding/Editing tags using TouchUp Reading Order
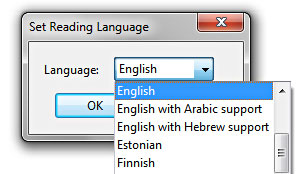
- Go to menu item: Tools > Accessibility > TouchUp Reading Order…
In most cases, it will help to have the four checkboxes checked (Show page content groups, Show table cells, Display like elements in a single block, Show tables and figures)
- Using the TouchUp Reading Order tool, drag* within the document pane to select a region of the page that contains one type of content (e.g. a text block)
Note: If you drag* over part of an already tagged element, the element is sometimes split up. This is helpful when splitting larger elements to ensure correct reading over of sub-elements.
- To add more page content to the current selection, Shift + drag*
- To remove page content from the current selection, Ctrl + drag*
- Select the appropriate button in the TouchUp Reading Order dialog to specify the tag type, a box should now encapsulate the element (the tags are explained here).
Tips for Tagging
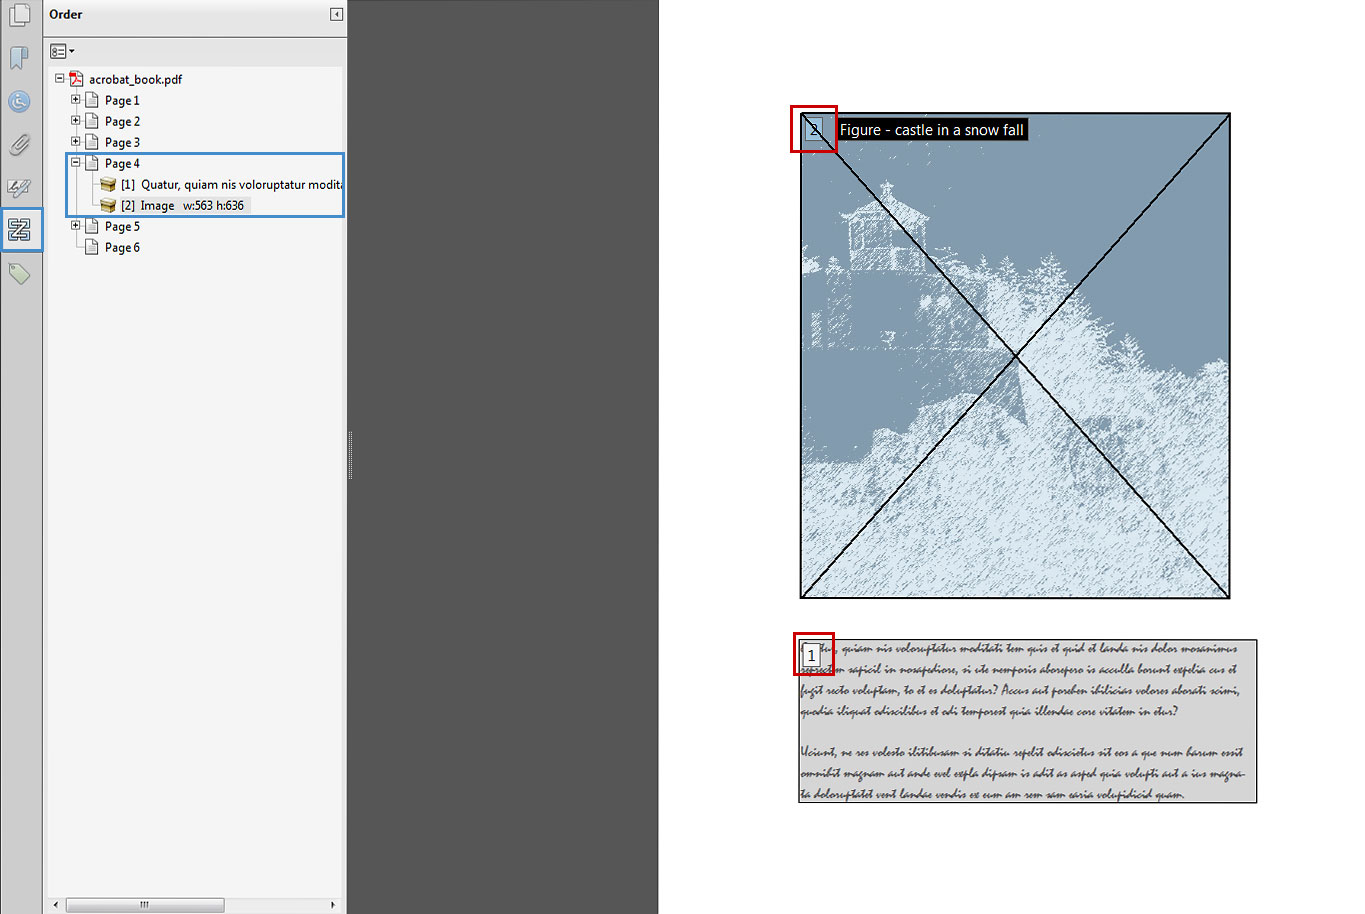
- On the “Touch Up Reading Order” dialog, make sure to select the Show page content groups checkbox and the Structure types radio button. This will display the type of structure for each tag, which will help you to spot mis-tagged content.
- A good place to start is tagging “Background” content, since this will reduce the number of tags to deal with. Background content should include:
- empty boxes,
- visible or invisible text box borders (especially in busy areas where they overlap with text),
- visuals that are decorative or redundant (e.g., backgrounds, illustrations), whose content is described adequately in the text .
- If you are having difficulty tagging complex content (e.g., a complex table), consider either:
- Editing the source document to simplify it, or
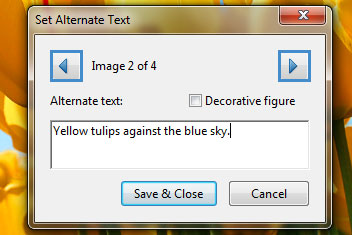
- Selecting the complex content and tagging it as a figure for which you must then add alternative text that properly conveys all of the information in the new figure
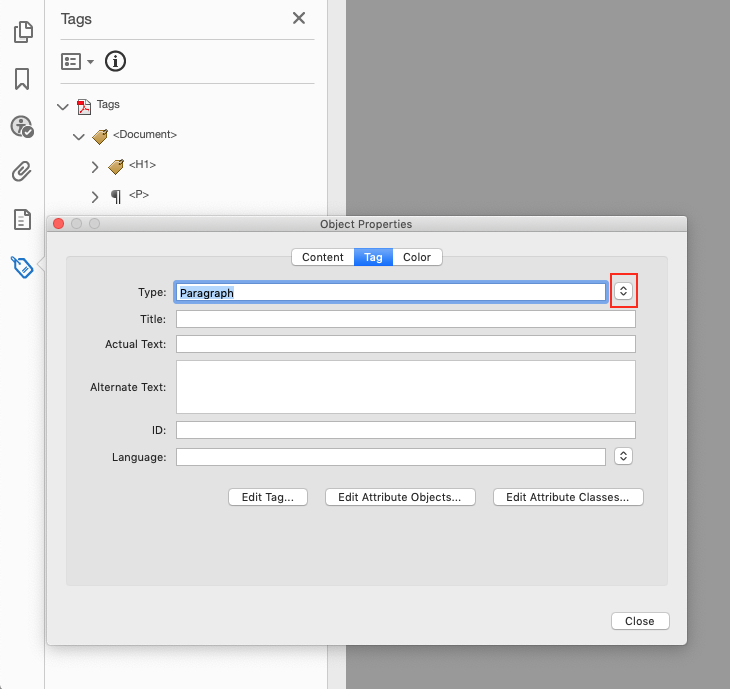
Editing tags using the Tags pane
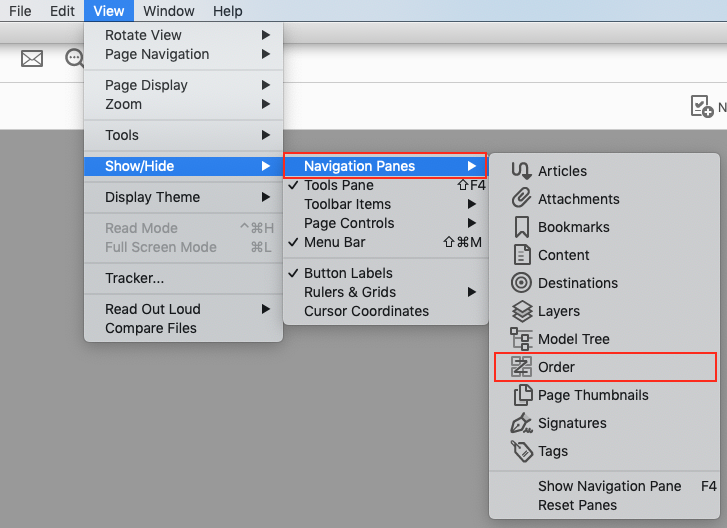
- Go to menu item: View > Show/Hide > Navigation Panes > Tags…
Note: For best results, use ‘Add Tags to Document’ first. You can also create a new tag using the TouchUp Reading Order dialog box and then edit it in the Tags Pane.
- To change a tag, locate it in the structure tree.
- Right-click* on the tag, and select Properties. From the drop-down menu next to tag type, select the tag you would like to use.
- Alternatively, you can edit tags by clicking on the tag name drop-down menu, and then typing the appropriate tag name (see list of tags above).