7.1 Tables
When using tables, it is important to ensure that they are clear and appropriately structured. This helps all users to better understand the information in the table and allows assistive technologies (e.g., screen readers) to provide context so that the information within the table can be conveyed in a meaningful way.
Tips for tables
- Only use tables for tabular information, not for formatting, such as to position columns.
- Use “real tables” rather than text formatted to look like tables using the TAB key or space bar. These will not be recognized by assistive technology.
- Keep tables simple by avoiding merged cells and dividing complex data sets into separate smaller tables, where possible. Whenever possible, use just one row of headings.
- If tables split across pages, set the header to show at the top of each page. Also set the table to break between rows instead of in the middle of rows.
- For more complicated tables, consider creating a text summary of the essential table contents. Any abbreviations used should be explained in the summary.
- Table captions or descriptions should answer the question “what is the table’s purpose and how is it organized?” (e.g., “A sample order form with separate columns for the item name, price and quantity”).
- Table cells should be marked as table headers when they serve as labels to help interpret the other cells in the table.
- Table header cell labels should be concise and clear.
- Ensure the table is not “floating” on the page.
Adding a table
- Go to Table (top navigation bar).
- Under Table Options select New.
- In the “New” drop down menu drag the columns and rows need.

Note: To style the table select the table on the page and choose the design available in the Table Styles panel.

Editor’s note: For later versions of Word for Mac, the insert table functions are in found in the Insert tab.
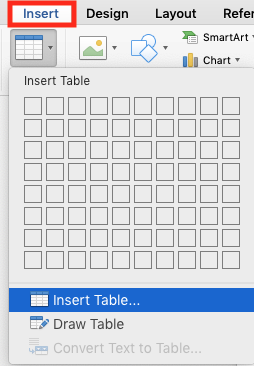
Note: Be sure to designate table headers: In the Table Design tab, select the checkbox for Header Row, to indicate table headings.
7.2. Lists
When you create lists, it is important to format them as “real lists”. Otherwise, assistive technologies will interpret your list as a series of short separate paragraphs instead of a coherent list of related items.
To create an ordered or unordered list
- Select Home (top navigation bar).
- Under Paragraph select the style (e.g., bullets, number).

7.3 Columns
Use Columns feature for placing text in columns. However, because columns can be a challenge for users of some assistive technologies, you should consider whether a column layout is really necessary.
7.4 Page Breaks
Start a new page by inserting a page break instead of repeated hard returns.
7.5 Use a Table of Contents
Creating an index or table of contents to outline office document content can provide a means of navigating the meaningful sequence of content.
To insert a table of contents
- Place the cursor in your document where you want to create the table of contents.
- Document Elements > Table of Contents.
- In the Table of Contents select the style you want to use.

Note: in order for the table of content to automatically set up the user must change all the heading to Heading 1.

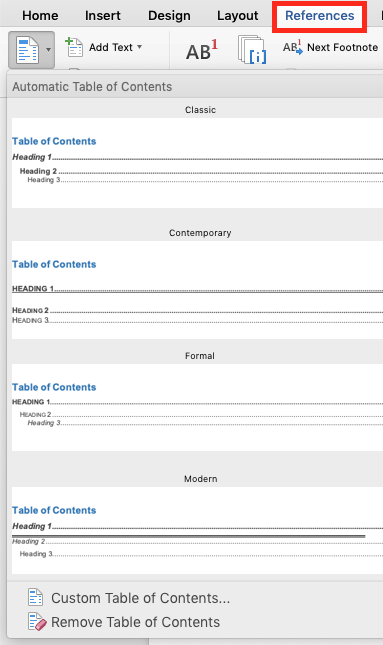
Editor’s note: In later versions of Word for Mac, the Table of Contents drop-down menu is located under the References menu.
To update table of contents
- Select the table.
- Select the drop down menu beside Table of Contents.
- Select Update Table…
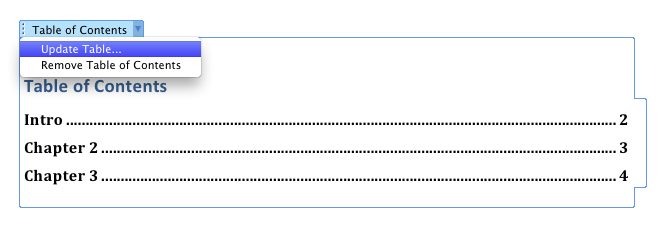
Editor’s note: In later versions of Word for Mac, the Update Table button is located under the References tab.

7.6 Use Page Numbering
Numbering the pages of your document helps those reading and editing your document effectively navigate and reference its content. For users of assistive technologies, it provides a valuable point of reference within the document.
Insert page numbers
- Go to menu item: Insert > Page Numbers…
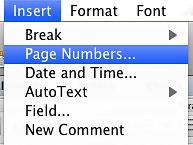
- In the Page Numbers dialog, select the page number characteristics (Position, Alignment, Show number on first page).
- Select OK.
Editor’s note: For later versions of Word for Mac, go to the Insert tab to find the Page Number button.

Formatting page numbers
- In the Page Numbers dialog, select Format…
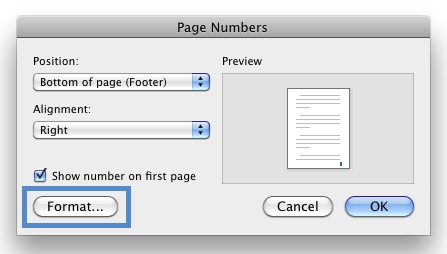
- Select the format characteristics in the Page Number Format dialog.
- Select OK.
Note: These changes are applied to the predefined page format styles. It does not create a new page format style.
7.7 Document Title
In case the document is ever converted into HTML, it should be given a descriptive and meaningful title.
To change title
- Go to menu item: File > Properties.
- In the Document Properties dialog, select Summary.
- Enter the title in the Title text box.
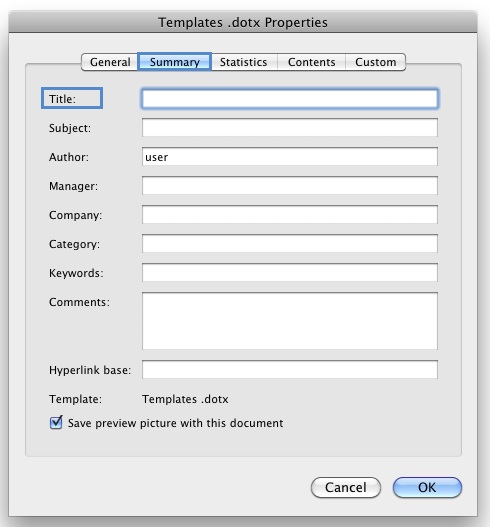
Tip: you can also fill in the subject, author and other descriptions if necessary

