7.1 Tables
When using tables, it is important to ensure that they are clear and appropriately structured. This helps all users to better understand the information in the table and allows assistive technologies (e.g., screen readers) to provide context so that the information within the table can be conveyed in a meaningful way.
Tips for tables
- Only use tables for tabular information, not for formatting, such as to position columns.
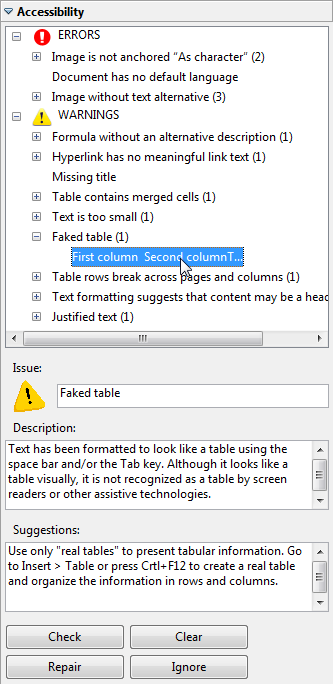
- Use “real tables” rather than text formatted to look like tables using the TAB key or space bar. These will not be recognized by assistive technology.
- Keep tables simple by avoiding merged cells and dividing complex data sets into separate smaller tables, where possible.
- Always set the header to show at the top of each page. Also set the table to break between rows instead of in the middle of rows.
- Create a text summary of the essential table contents. Any abbreviations used should be explained in the summary.
- Table captions or descriptions should answer the question “what is the table’s purpose and how is it organized?” (e.g., “A sample order form with separate columns for the item name, price and quantity”).
- Table cells should be marked as table headers when they serve as labels to help interpret the other cells in the table.
- Table header cell labels should be concise and clear.
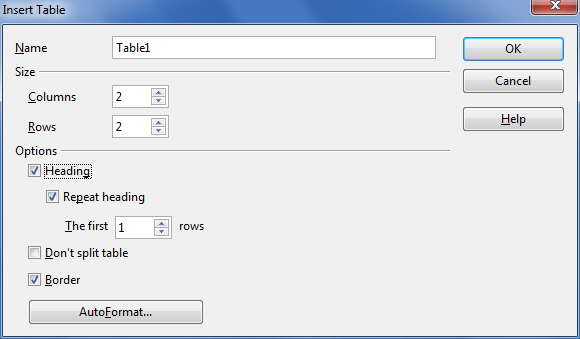
To add a table with headings
- Go to menu item: Insert > Table (Ctrl+F12).
- Enter a name for the table.
- Specify the number of columns and rows in the table.
- Select the Heading check box.
- Select the Repeat heading check box.
- Indicate the number of rows you want to use for the heading in The first…rows spinner box.
Note: Whenever possible, keep tables simple with just 1 row of headings.
To add table headings manually
- Highlight the table cells that should be headers.
- Go to menu item: Format >Styles and Formatting (F11).
- Select the Heading check box and make sure that Repeat heading is checked.
To make tables break between rows instead of in the middle of rows
- Place the cursor inside the table.
- Go to menu item: Table > Table Properties.
- Select the Text Flow tab.
- Unselect the check box Allow row to break across pages and columns.
- Select OK.
7.2. Lists
When you create lists, it is important to format them as “real lists”. Otherwise, assistive technologies will interpret your list as a series of short separate paragraphs instead of a coherent list of related items.
To create an ordered or unordered list
This applies a paragraph style for lists that makes sure that assistive technology and other software can recognize the content as a list.
- Select text.
- Go to menu item: Format > Styles and Formatting.
- In the Styles and Formatting dialog, select a list style such as List 1 or Numbering 1.
Note: Do not select the style “List”: this style is reserved for modifying all list styles or numbering styles at once.
There are two methods for adding visual list formatting to this list: the first one modifies the applied paragraph style:
- Go to menu item: Format > Styles and Formatting.
- Right-click* the paragraph style you applied to the content (e.g., List 1 or Numbering 1).
- Select Modify…
- In the Paragraph Style dialog, select the Outline & Numbering tab.
- Select a Numbering Style (this drop-down list also contains styles for unordered lists).
- Select the Indents and Spacing tab.
- Set the indent values you would like to use for this list type.
- Select OK.
The second method changes the visual formatting of a list without changing all lists based on the same style:
- Select the list
- Go to menu item: Format > Bullets and Numbering.
- In the Bullets and Numbering dialog, select the Bullets tab for unordered lists or the Numbering type tab for ordered lists.
- Select a list style from the Selection gallery.
- Select OK.
To create sublists
This is the only way to create a true sublist (i.e. a list that is (internally) a child list of the list item above it) instead of a list that is merely indented more from the margin.
- Select the list items that should become a sublist.
- On the Bullets and Numbering toolbar, select the button Demote One Level or the button Demote One Level with Subpoints.

To create new list styles
- Go to menu item: Format > Styles and Formatting.
- In the Styles and Formatting dialog, select the List Styles icon.
- Right-click* a style from the list.
- Select New…
- In the Numbering Style dialog, enter a name for the list style in the Name box.
- Format the list using the available formatting options in the various tabs.
- Select OK.
Note: This does not create new paragraph styles but new formatting styles that you can apply to paragraph styles for lists. Even though the names for the formatting styles (List 1, Numbering 1 etc.) that appear when you select the List Styles icon are the same as some of the paragraph styles that appear when you select the Paragraph Styles icon, their purpose is different: the Paragraph Styles are for document structure and other paragraph features (e.g. indent), the List Styles are for the numbering or bullet style.
7.3 Columns
Use the Columns feature for placing text in columns.
Note: Because columns can be a challenge for users of some assistive technologies, consider whether a column layout is really necessary.
7.4 Page Breaks
Start a new page by inserting a page break instead of repeated hard returns.
To insert a page break, use the shortcut Ctrl + Enter or go to the menu item Format > Manual Break and select Page Break (the default option).
7.5. Use a Table of Contents
Creating an index or table of contents to outline office document content can provide a means of navigating the meaningful sequence of content.
The best way to generate a table of contents is after applying the predefined heading styles, such as “Heading 1” as described above, to the headings that you want to include in your table of contents. After you apply these styles, you can then create a table of contents.
To insert a Table of Contents
- Select in your document where you want to create the table of contents.
- Go to menu item: Insert > Indexes and Tables > Indexes and Tables.
- Select the Index/Table tab.
- Select Table of Contents in the Type dropdown.
- Select OK.
To use a different paragraph style as a Table of Contents entry
- Select in your document where you want to create the table of contents.
- Go to menu item: Insert > Indexes and Tables > Indexes and Tables.
- Select the Index/Table tab.
- Select Table of Contents in the Type box.
- In the Create from area, select the Additional Styles check box.
- Select the (…) button next to the check box.
- In the Assign Styles dialog, select the style in the list.
- Select the >> or the << button to define the outline level for the paragraph style.
To update a Table of Contents
- Select Tools > Update > All Indexes and Tables.
7.6 Use Page Numbering
Numbering the pages of your document helps those reading and editing your document effectively navigate and reference its content. For users of assistive technologies, it provides a valuable point of reference within the document.
To Insert Page Numbers
- Go to menu item: Insert > Footer.
- Select the page style that you want to add the footer to. If you have not created or applied any special page styles, “Default” will be the only option.
- Go to menu item: Insert > Fields > Page Number.